Share What You Love Bundles
|
Happy May!
How would you
like to get your hands on new product from the upcoming 2018-2019 Annual Catalog before it goes live on June 1? Stampin' Up! is celebrating 30 years, and to commemorate this milestone, the Share What You Love Suite will be in the new catalog. But, in May, Stampin' Up! is offering this suite early through 3 Share What You Love product bundles. There's something for every crafter! Each of the bundles comes with at least one gift! The 4th bundle option is the 4 new In Color ink pads available at a 10% discount!
Please let me know if you have any questions:
annehayward@stampingwithbluemooncreations.com |
|
Shop Share What You Love Bundles |
| |
HK27JMZUOrders using this hostess code will be combined.As always, if we have enough in sales to make the order a workshop ($150), we will have a Mystery Hostess.Please place your order online by May 26.I will notify our hostess by e mail on May 27.The
workshop will need to close on May 30.Happy Shopping!
Congrats to:
January Hostess- Rebecca C.
February Hostess-Gail M.
March Hostess-Sandy T.April Hostess-Betty S.
|
|
Shop Online 24/7 |
Product Spotlight-My Favorite Retiring Stamp Sets! |
Here are some of my favorite retiring products. I'll be sad to see them go!
|
|
Shop Last-Chance Products HERE |
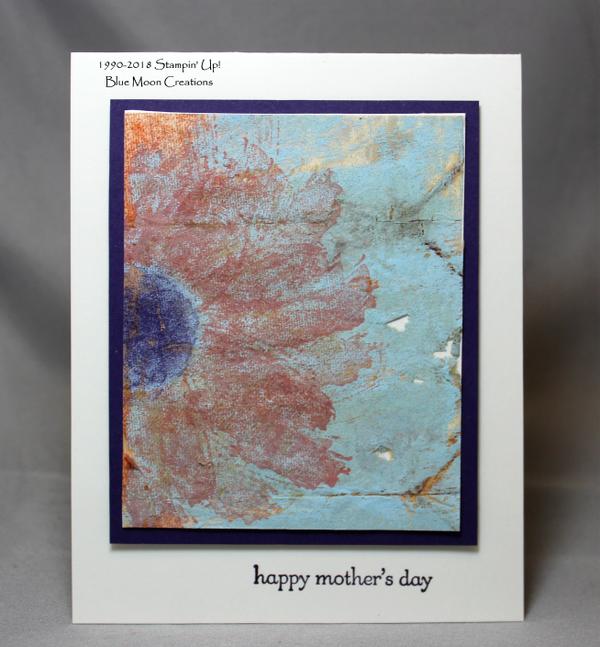
Crafting with Tea Bags-Work of Art Flower |
1. Brew a cup of tea. Remove tea bag and set aside to dry completely. I set the tea bag on a plate on a window sill to dry for a couple of days. Once dry, remove the staple that is holding the fold of the bag and the string with label. Cut open the tea bag along the seam with a pair of scissors. Carefully open it up and empty out the tea leaves. Open up the tea bag completely and cut into two pieces. You can use the other
half for another project. 2. Paint Whisper White Craft ink mixed with Marina Mist ink refill (or light blue acrylic ink) using a small brush and allow to dry. 3. Create a mask for the center of the flower by punching a 3/4" circle out of a post-it-note. Place the circle mask along left side of tea bag.
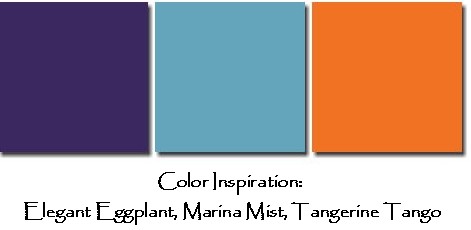
Stamp small "swoosh" image from Work of Art stamp set using Tangerine Tango ink repeatedly around the mask. Stamp full strength, then off-stamp and stamp again. Remove the mask, and with a sponge, add Elegant Eggplant ink in the circle. 4. Using a glue stick or adhesive sheet, attach tea bag to a piece of Very Vanilla card stock to give it weight, allowing you to trim down the piece as desired. Attach to Elegant Eggplant mat.
5.. Attach to Very Vanilla card base using Dimensionals on the four corners to pop it up. Stamp greeting from Teeny Tiny Wishes using Elegant Eggplant ink to complete Supplies Used:Stamp Sets: Work of Art, Teeny Tiny Wishes (both retiring) Ink: Tangerine Tango, Elegant Eggplant
(both retiring) Paper: Very Vanilla, Elegant Eggplant (retiring) Accessories: tea bag, blue acrylic paint (optional), paint brush, post-it-note, 3/4" circle punch, Mini Dimensionals |
|
Click HERE for Crafting with Tea Bags Tutorial in a pdf format |
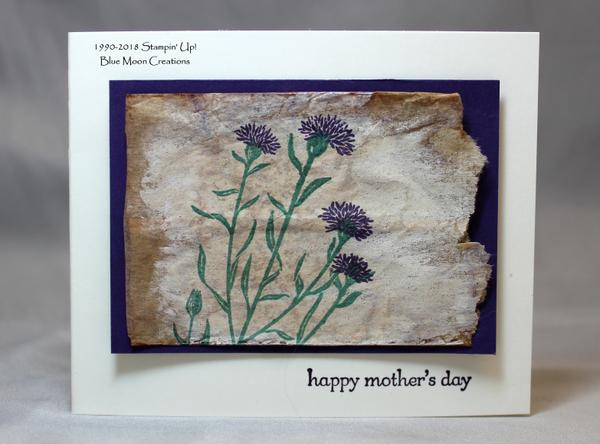
Crafting with Tea Bags-Wild About Flowers |
1. Brew a cup of tea. Remove tea bag and set aside to dry completely. I set the tea bag on a plate on a window sill to dry for a couple of days. Once dry, remove the staple that is holding the fold of the bag and the string with label. Cut open the tea bag along the seam with a pair of scissors. Carefully open it up and empty out the tea leaves. Open up the tea
bag completely and cut into two pieces. You can use the other half for another project. 2. Paint Whisper White Craft ink (or white acrylic ink) using a small brush and allow to dry. Once dry, stamp leaf image from the two-step stamp Wild About Flowers using Tranquil Tide ink. Stamp flowers using Elegant Eggplant ink. 3. Tear end of tea
bag and attach to Elegant Eggplant matting. Attach to Very Vanilla card base using Mini Dimensionals to pop it up 4. Stamp greeting from Teeny Tiny Wishes using Elegant Eggplant ink to complete. Supplies Used:Stamp Sets: Wild About Wildflowers, Teeny Tiny Wishes (both retiring) Ink:
Tranquil Tide, Elegant Eggplant (both retiring), Whisper White Craft Paper: Very Vanilla, Elegant Eggplant (retiring) Accessories: tea bag, white acrylic paint (optional), paint brush, Mini Dimensionals
|
|
Click HERE for Crafting with Tea Bags Tutorial in a pdf format |
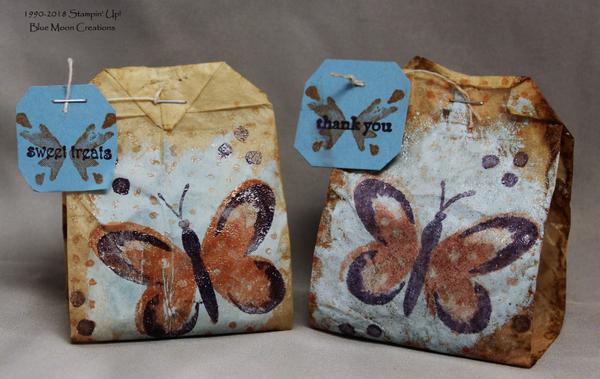
Watercolor Wings Tea Bag Treat Holders |
1. Brew a cup of tea.
Remove tea bags and set aside to dry completely. I placed the bags on a small plate and set it in a window sill for a couple of days. Once dry, remove the staple that is holding the label and string to the top fold of the bags. Toss the label, but keep the strings for use later. Cut open the tea bags along the seam with a pair of scissors. Carefully open them up and remove the tea leaves. 2. Lay the tea bags flat.
Add drops of White Craft ink with a drop or two of Marina Mist ink refill onto a paint palette and mix using a brush. Add more white or Marina Mist refill as desired. Paint one end of the tea bags with the ink mixture using a brush. Set aside to let the ink dry completely. It will take some time for the craft ink to dry. You could also use white acrylic paint with Marina Mist ink refill mixed it. Or, use light blue acrylic paint with no mixing. This
mixture does not take long to dry. 3. Stamp the three-step butterfly from Watercolor Wings. Ink the solid image first using Tangerine Tango ink, stamp off, then stamp. Stamp the detail image next using Tangerine Tango ink full strength. Stamp the outline image last using Elegant Eggplant ink. Stamp the body and antenna using Elegant Eggplant ink. Randomly stamp the three dot image using Elegant Eggplant ink.
Randomly stamp the dotted lines image using Tangerine Tango ink. 4. Optional: sprinkle clear embossing powder over stamped images and heat emboss using a heat tool. 5. Cut a piece of scrap Marina Mist card stock 1 1/4" x 1 1/4". Stamp smaller butterfly from Watercolor Wings using Tangerine Tango ink. Stamp a greeting from Teeny Tiny Wishes using Elegant Eggplant ink. Trim the
corners using a pair of scissors, so it looks like a tag. 6. Fold the tea bags to their original shapes. Fold the tops over. Staple the string to the bags using a stapler. Punch a small hole in the Marina Mist tag and thread the string through the hole, tying a knot to secure. Add a Glue Dot on the corner of the tea bags. Secure the tags to the Glue Dot. 7. Insert miniature
candy bars or other treats inside the tea bags to complete. Supplies Used:Stamp Sets: Watercolor Wings, Teeny Tiny Wishes (both retiring) Ink: Marina Mist, Tangerine Tango, Elegant Eggplant (all retiring), Whisper White Craft
Paper: Marina Mist (retiring) Accessories: tea bags, white acrylic paint (optional), paint brush, heat tool, clear embossing powder, stapler, 1/16" hole punch, stapler, Glue Dot, miniature candies |
|
Click HERE for Tea Bag Treat Holder Tutorial in a pdf format |
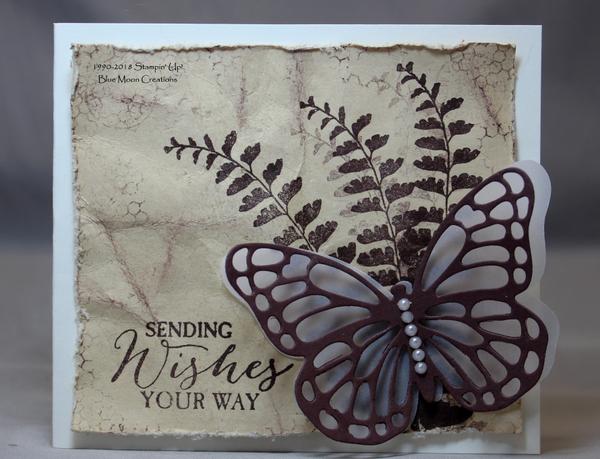
Tea Stained Antiqued Paper-Butterfly Basics
|
1. Steep 3-4 black tea bags (cut off the tags and string) in approx 6 cups of boiling water for 10 minutes. Option: You can add cinnamon and allspice to the water to help deepen
the color. When time is up, remove tea bags and any spices you've added using a pair of tongs. Or you can use a strainer. Carefully pour tea into a shallow dish, something like a baking sheet that has sides. Insert paper into the tea mixture and let sit. I let my Very Vanilla card stock sit in the mixture for 45 minutes or so, turning it over every few minutes. When satisfied with the color, remove the paper and set on a surface to dry. I used aluminum foil,
but you could use waxed paper, paper towels, or a towel. You need something that will keep the tea from soaking into your work surface and possibly staining it. It took my paper about 3 hours to dry completely. 2. Collage stamp greeting, leaves, and other images from Butterfly Basics in Chocolate Chip ink. 3. Crumple up
the card stock. Somewhat flatten it out, but leave some creases. Lightly sponge Chocolate Chip ink onto the creases. Smooth paper out. Distress by either tearing or applying a distress tool along the edges. Apply to Very Vanilla card base using Mini Dimensionals on the four corners to pop it up. 4. Cut a solid butterfly out of vellum card stock using the Big Shot and Bold Butterfly Framelits
Die. Cut a detailed butterfly out of Chocolate Chip card stock using the Big Shot and Butterflies Thinlits Dies. Layer together using a Mini Dimensional in between. 5. Attach butterfly to card front using a Mini Dimensional. Attach a string of pearls to the butterfly to complete. Supplies
Used: Stamp Sets: Butterfly Basics (retiring) Ink: Chocolate Chip (retiring) Paper: Very Vanilla, Chocolate Chip (retiring), Vellum Card Stock Accessories: tea bags, baking sheet, sponge, Big Shot, Bold Butterfly Framelits Dies and Butterflies Thinlits Dies (both retiring), Dimensionals, pearls, distressing tool |
|
Click HERE for Tea Stained Antique Paper Tutorial in a pdf format |
|
|
|