2018 Occasions and Sale-A-Bration
|
Happy February! Happy
Valentine's Day! The Occasions and Sale-A-Bration Catalogs are available with fun and new spring-inspired products!
And don't forget, during Sale-A-Bration (January 3-March 31, 2018),
for every $50 spent, you'll be able to choose a free exclusive item out of the Sale-A-Bration Catalog.
This is in addition to the original Sale-A-Bration product.
Now is the time to stock
up!
Please let me know if you have any questions: annehayward@stampingwithbluemooncreations.com
|
|
Shop 2018 Occasions and Sale-A-Bration Catalogs Here |
| |
9MC4CFWW
Orders using this hostess code will be combined.
As always, if we have enough in sales to make the order a workshop ($150), we will have a Mystery Hostess.Please place your order
online by February 25.I will notify our hostess by e mail on February 26.The workshop will need to close on February 28. Happy Shopping!
|
|
Shop Online 24/7 |
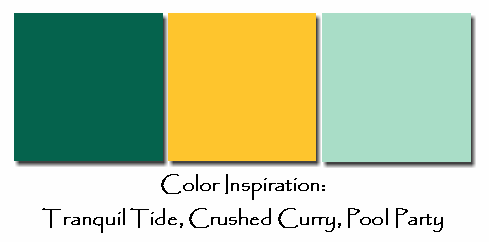
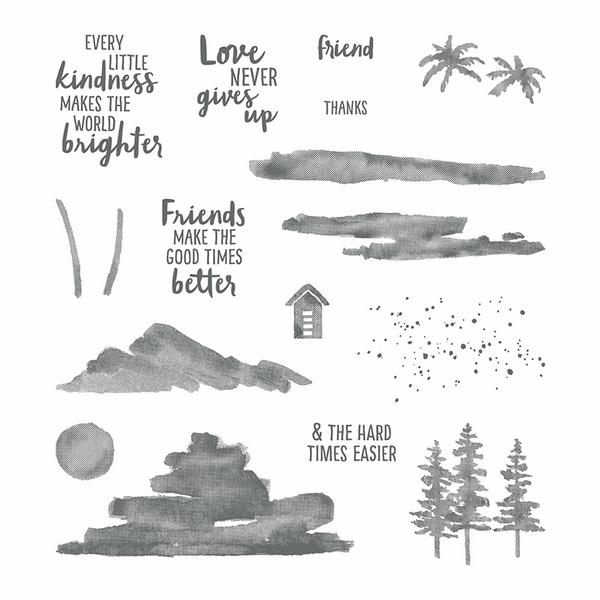
Product Spotlight-Waterfront Stamp
Set
|
Create tranquil scenes, whether it's mountain sunrises, moonlit nights, or tropical beaches, using the photopolymer Waterfront stamp set. |
|
Shop Waterfront stamp set online |
Waterfront Reflection Technique
|
1. To create a
mask for the sun, punch a circle out of a post-it-note using 3/4" circle punch. Place the circle mask towards the center of a Whisper White card front. Lay a piece of scrap copy paper below the mask covering the bottom half of the card front. Create the sky by adding Marina Mist, Island Indigo, Sweet Sugarplum, and Crushed Curry inks using a sponge.
2. Place stencil over the negative space left over from the masked sun, and sponge
on Crushed Curry ink.
3. Stamp the mountains from the Waterfront stamp set using Tranquil Tide ink. Stamp the horizon image below the mountains using Tranquil Tide ink.
4. To create the reflection, stamp the mountain image onto a piece of window sheet using Tranquil Tide ink. Turn the window sheet upside down and place it below the stamped landscape. Using your fingertips,
transfer the ink from the window sheet onto the card stock.
5. Add the sun reflection in the water by sponging on Crushed Curry ink.
6. Add the water on both sides of the sun reflection by sponging on Island Indigo and Pool Party inks.
7. Stamp the trees using Archival Black ink.
8. Attach the card front to Basic Black mat. Attach to So Saffron card base using Mini Dimensionals to pop it up.
9. Stamp greeting using Archival Black ink to complete.
Supplies Used: Stamp Set: Waterfront, Flora & Flutter (December Paper Pumpkin Kit for the greeting)
Ink: Marina Mist, Island Indigo, Pool Party, Sweet Sugarplum, Crushed Curry, Tranquil Tide, Archival Black Paper: So Saffron, Basic Black, Whisper White Accessories: sponge, window sheet, 3/4" circle punch, post-it-note, copy paper, Mini Dimensional
|
|
Click HERE for a step by step Reflection Technique Tutorial in a pdf format |
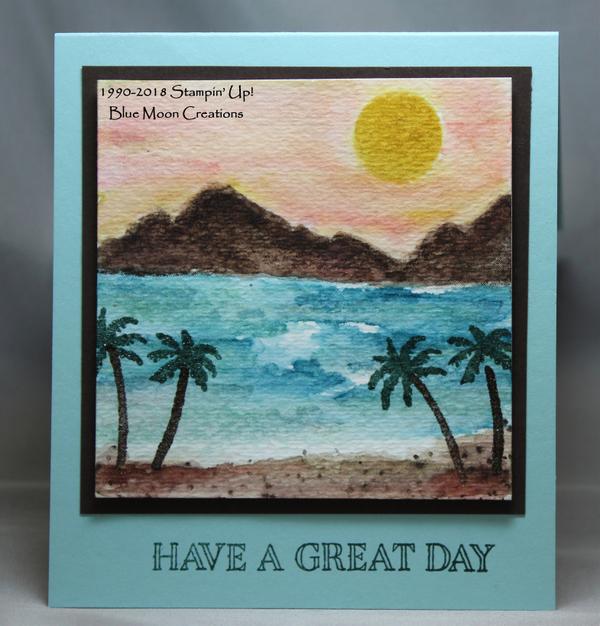
Waterfront Tropical Beach
|
1. To create a mask for the sun punch a circle using a 3/4" circle punch out of a post-it-note. You'll be using the negative space for the mask. Place the mask on watercolor paper card front. Sponge Crushed Curry ink inside the circle to create the sun.
2. Stamp the mountains using Early Espresso ink. Create a mask for the mountains by stamping the images on a
post-it-note and cutting them out using a pair of scissors. To create the sky, place the mountain masks over the stamped mountains, and the punched out circle over the sponged on sun. Stamp the "water" and "landscape" images over the masks using Crushed Curry, Peekaboo Peach, and Calypso Coral inks. Blend in the colors using an aqua painter.
3. To create the water, stamp the "water' and "landscape" images using Pool Party
and Island Indigo inks. Leave spaces between the images so some white shows through for waves and the beach. Blend in the colors using an aqua painter.
4. To create the beach, stamp the "water" and "landscape" images on the bottom of the card front using Crumb Cake and Early Espresso inks. Blend in the colors using an aqua painter. 5. Set the piece aside to dry completely.
Stamp the trunks of the palm trees using Early Espresso ink. Stamp the palms using Tranquil Tide ink. Because I wanted the palm tree images to stand out a little more, I heat embossed them using a heat tool and clear embossing powder. Stamp the sprinkles on the beach using Early Espresso ink. Lightly blend them in using an aqua painter.
6. Attach card front to Early Espresso mat using Mini Dimensionals to pop it up.
Stamp greeting onto Pool Party card base using Tranquil Tide ink. Attach card front to card base to complete.
Supplies Used:Stamp Sets: Waterfront, Flora & Flutter (December 2017 Paper Pumpkin kit)
Ink: Crushed Curry, Early Espresso, Peekaboo Peach, Calypso Coral, Pool Party, Island Indigo, Crumb Cake, Tranquil
Tide Paper: Pool Party, Early Espresso watercolor paper Accessories: 3/4" circle punch, post-it-note, aqua painter, heat tool, clear embossing powder |
|
|
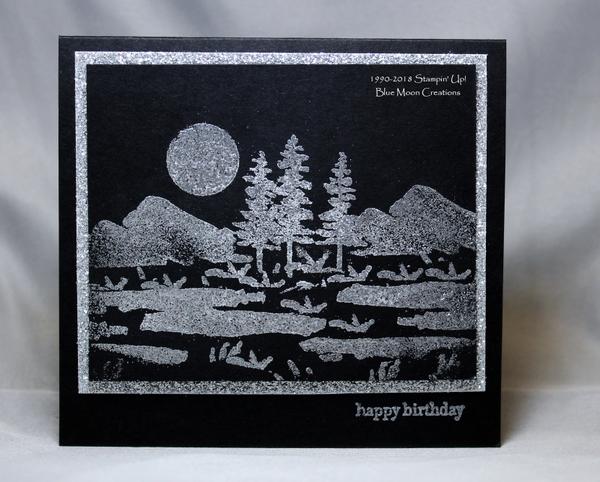
Embossed Waterfront Moonlit Night
|
1. Create a mask for the moon by punching out a circle from a post-it-note using a 3/4" circle punch. You'll
be using the negative space as your mask. Create a mask for the trees by stamping the image onto a post-it-note, then cutting out the image using a pair of scissors. 2. Swipe Embossing Buddy over the card front. Place the post-it-note with the circle punched out of it onto Basic Black card front. Place the tree image mask onto the card front. With a sponge, apply Versamark through the punched hole, then remove the mask. Stamp the
mountains from Waterfront over the masked trees using Versamark. Remove the tree mask and heat emboss circle and mountains using a heat tool and silver embossing powder. 3. Stamp the tree image in the empty space between the mountains using Versamark. Heat emboss using a heat tool and silver embossing powder. 4. Stamp the land image repeatedly on the bottom of the card front using Versamark.
Heat emboss using a heat tool and silver embossing powder. Place a piece of copy paper on the bottom half of the card front to create a mask. Create grass by stamping the top parts of the "palm trees" image from the stamp set around the base of the trees and along the ground on the bottom of the card front using Versamark ink. Heat emboss using a heat tool and silver embossing powder. Repeat to add more grass as needed. 5. Attach
card front to glimmer paper mat using Mini Dimensionals to pop it up. Attach to Basic Black card base. 6. Swipe Embossing Buddy along lower edge of card base. Stamp greeting using Versamark and heat emboss using a heat tool and silver embossing powder to complete.
Supplies Used: Stamp Set: Waterfront, Teeny Tiny
Wishes (greeting)Ink: Versamark Paper: Basic Black, glimmer paper Accessories: Embossing Buddy, heat tool, silver embossing powder, Mini Dimensionals, 3/4" circle punch, post-it-note, copy paper |
|
Click HERE for a step by step Embossed Waterfront Moonlit Night Tutorial in a pdf format |
|
|
|