Smackin' Acetate Background Technique
|
Create pretty abstract backgrounds using the Smackin' Acetate Technique.
It is easy to create and just takes a few supplies: -window or transparency sheets (I have a stash
of transparency sheets that I received from my MIL before she passed away. She gave me 3 full boxes, so that is what I used for this project. SU! window sheets will work just as well.)
-markers or ink refills -glossy or matte card stock -spritzer bottle filled with water
|
|
|
| |
Here's How:
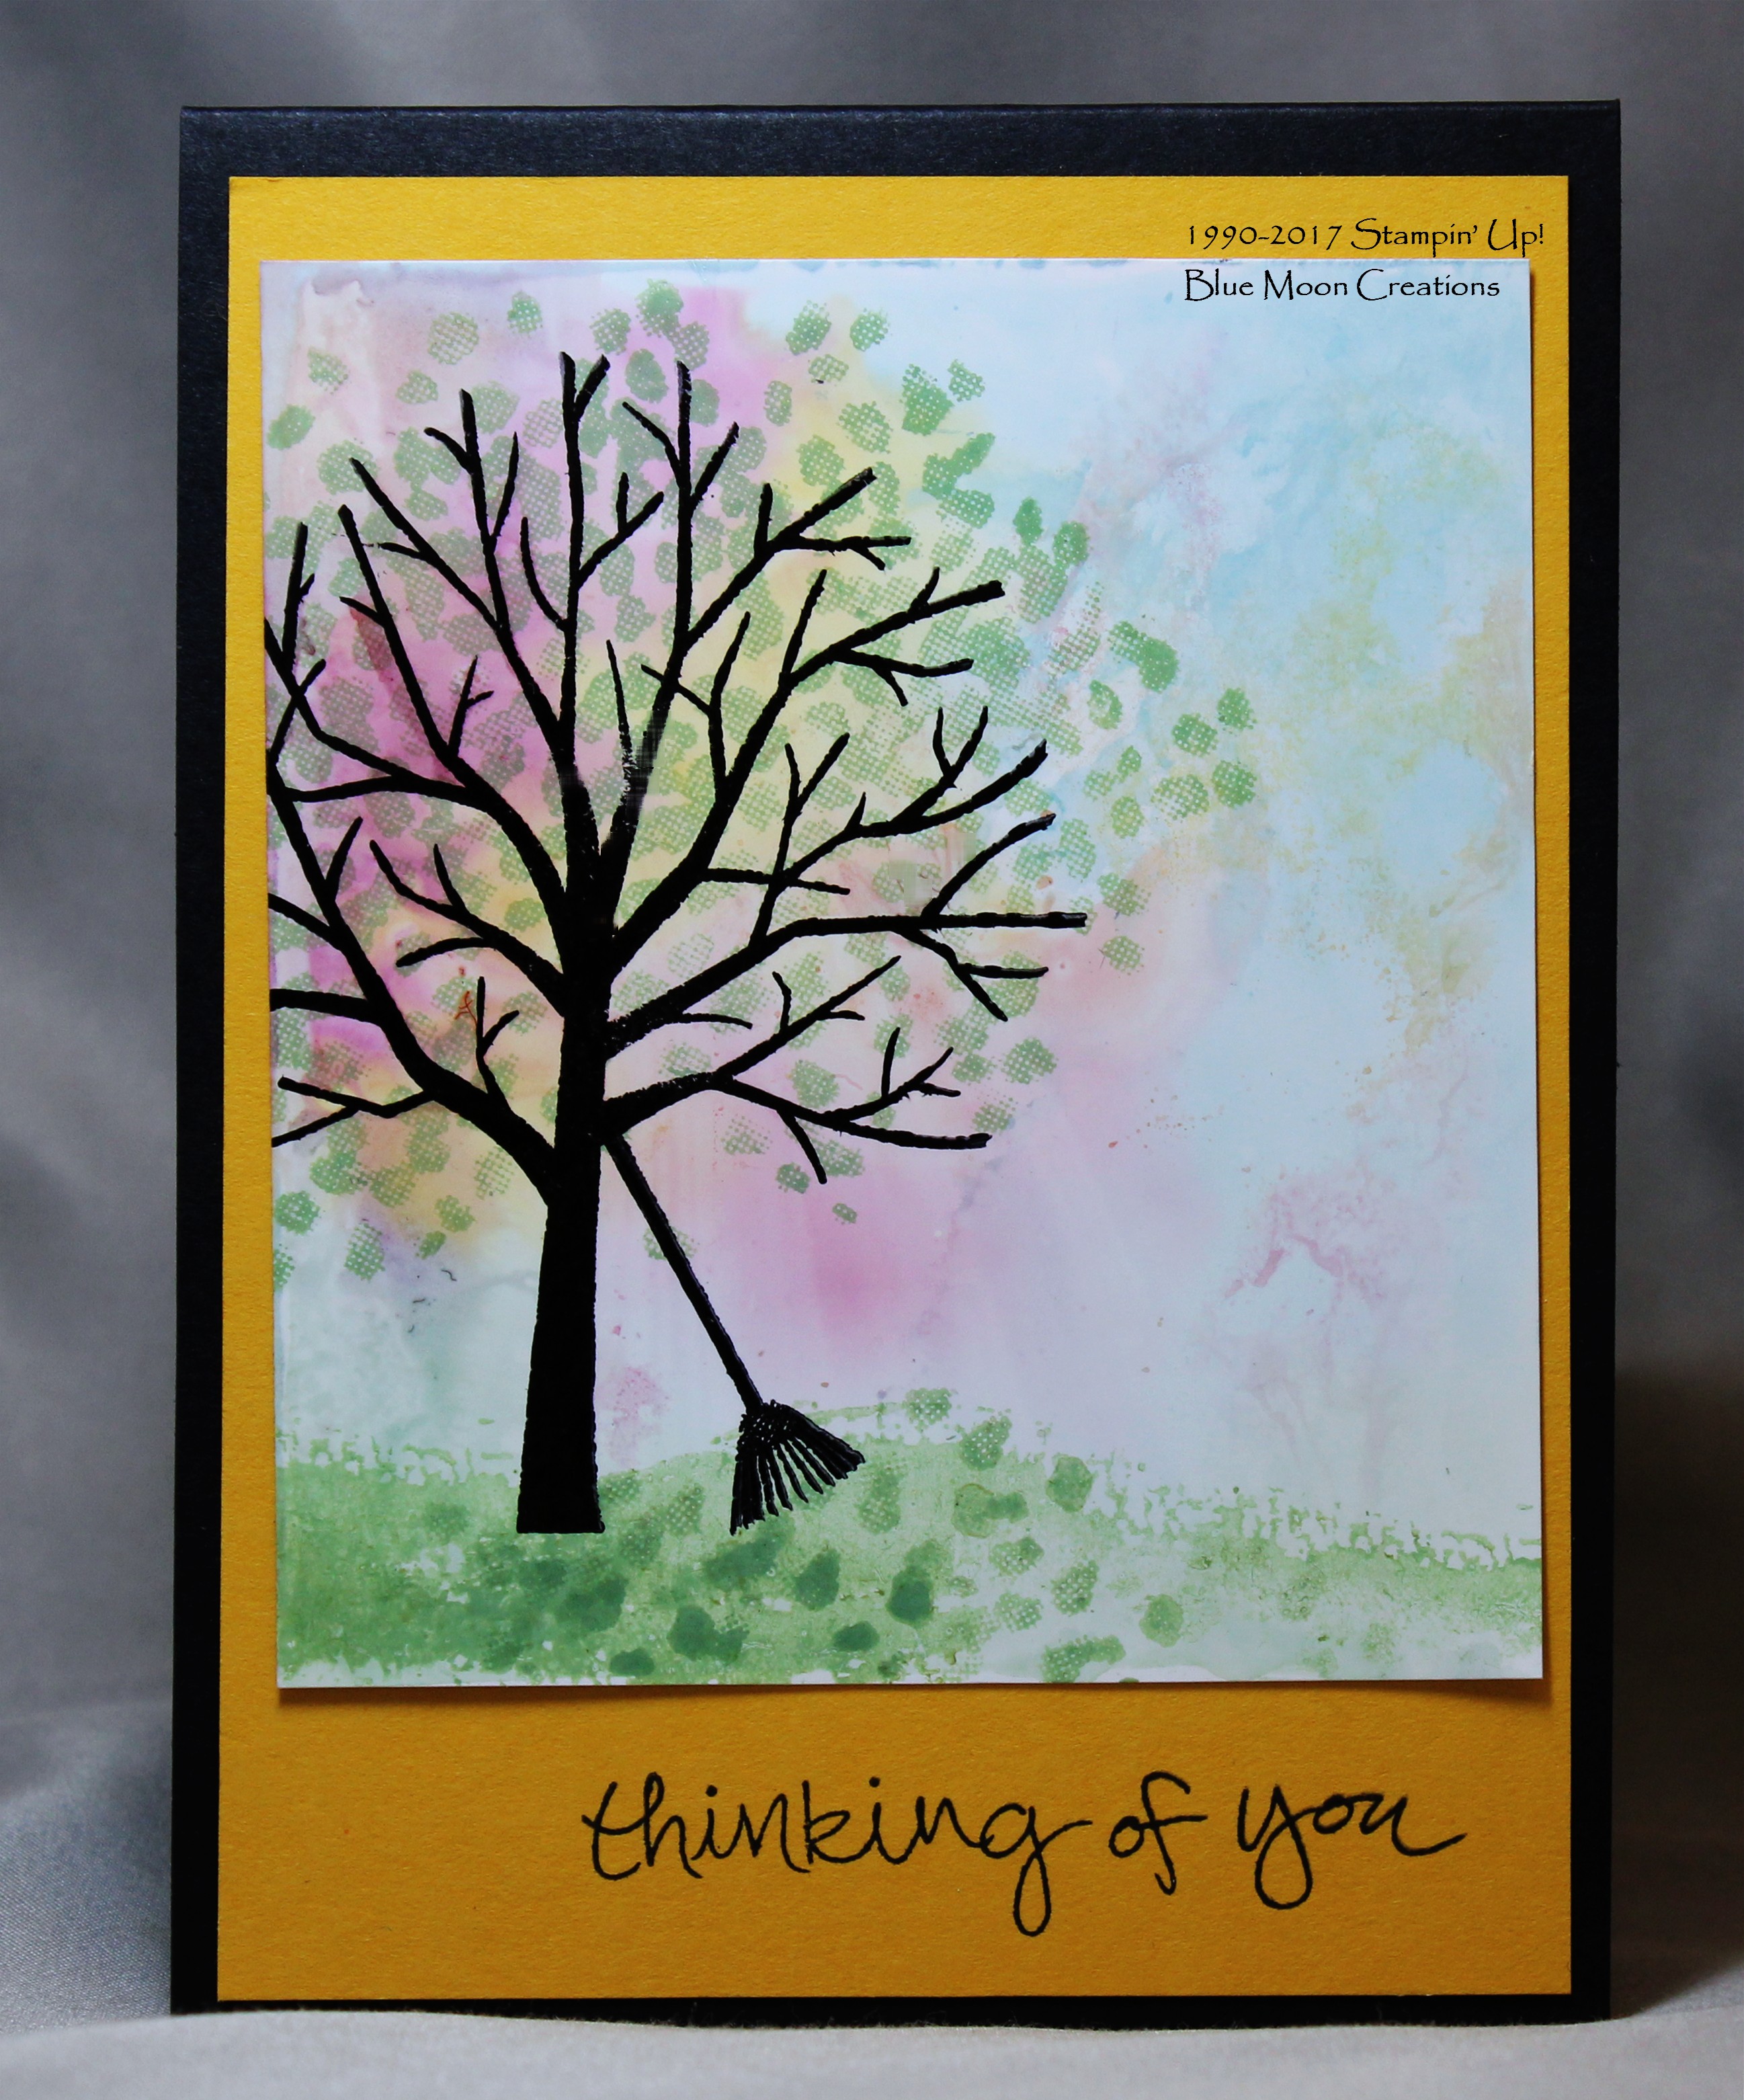
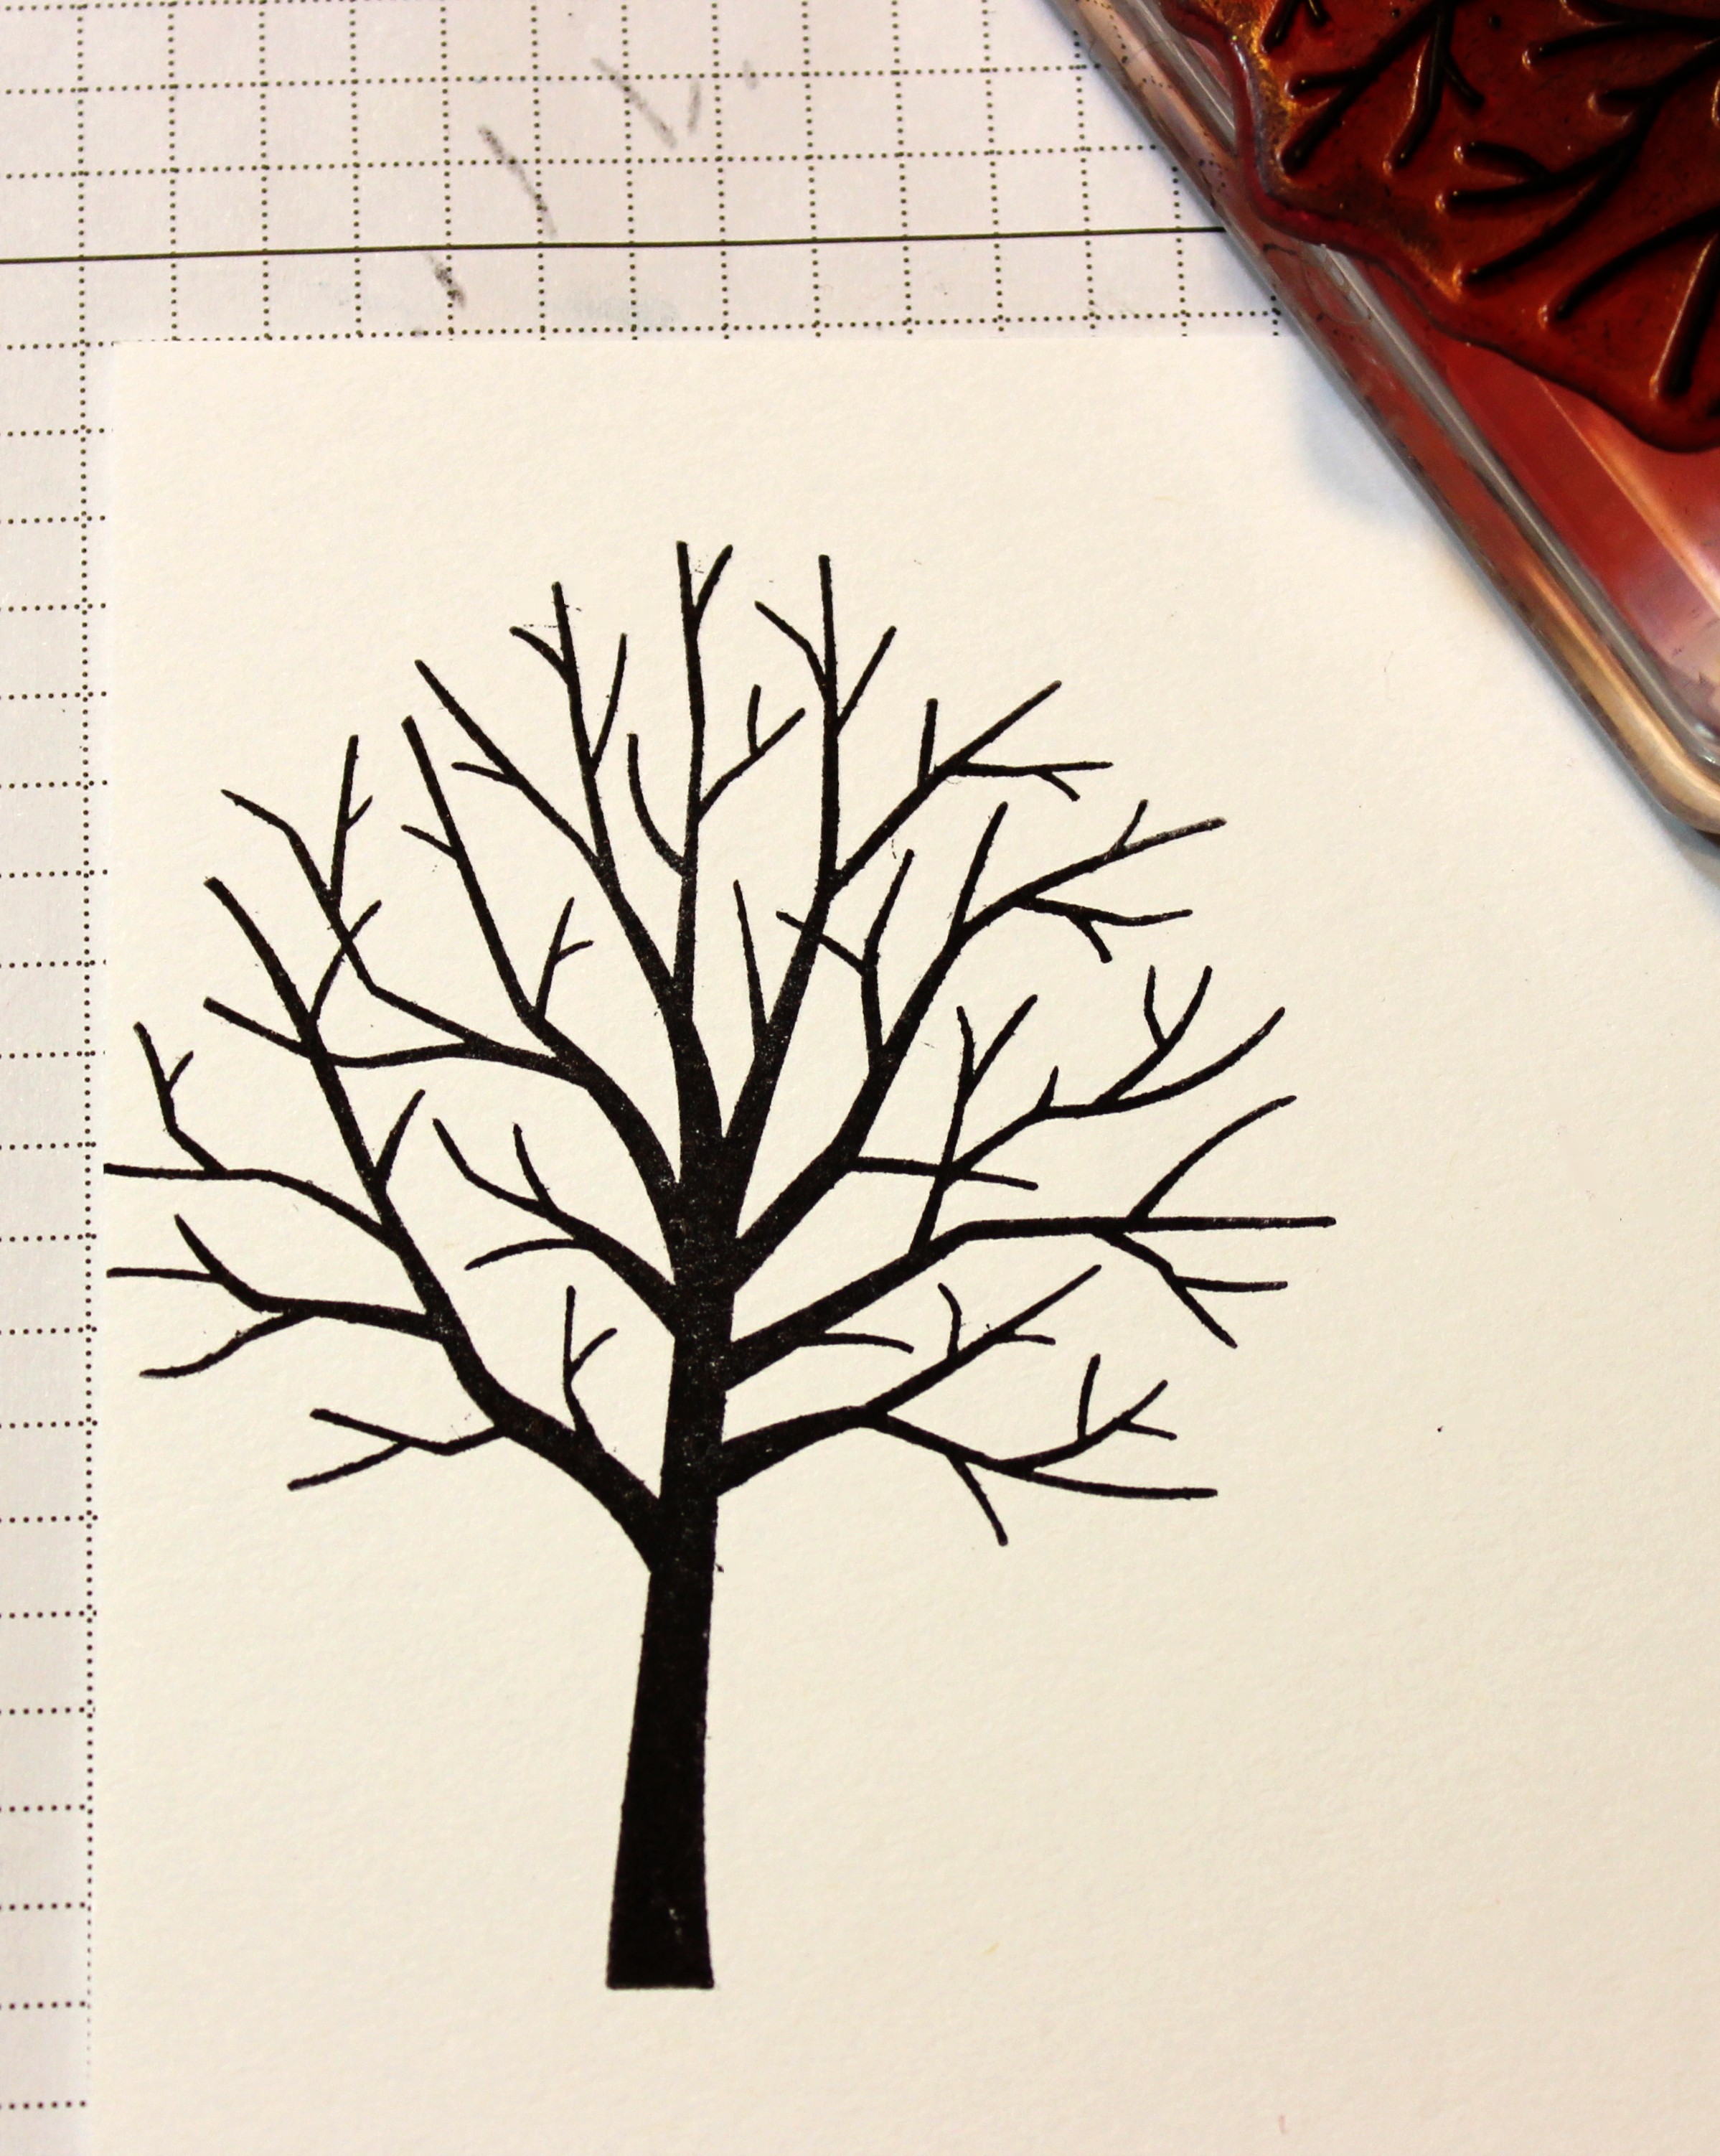
For my first card, I decided to use glossy card stock. 1. Stamp tree image from Sheltering Tree onto 3 1/4" x 3 3/4" glossy card front using Archival Black ink. Set the piece aside to allow the ink to dry
completely. You could also use Black Stazon. |
|
|
| |
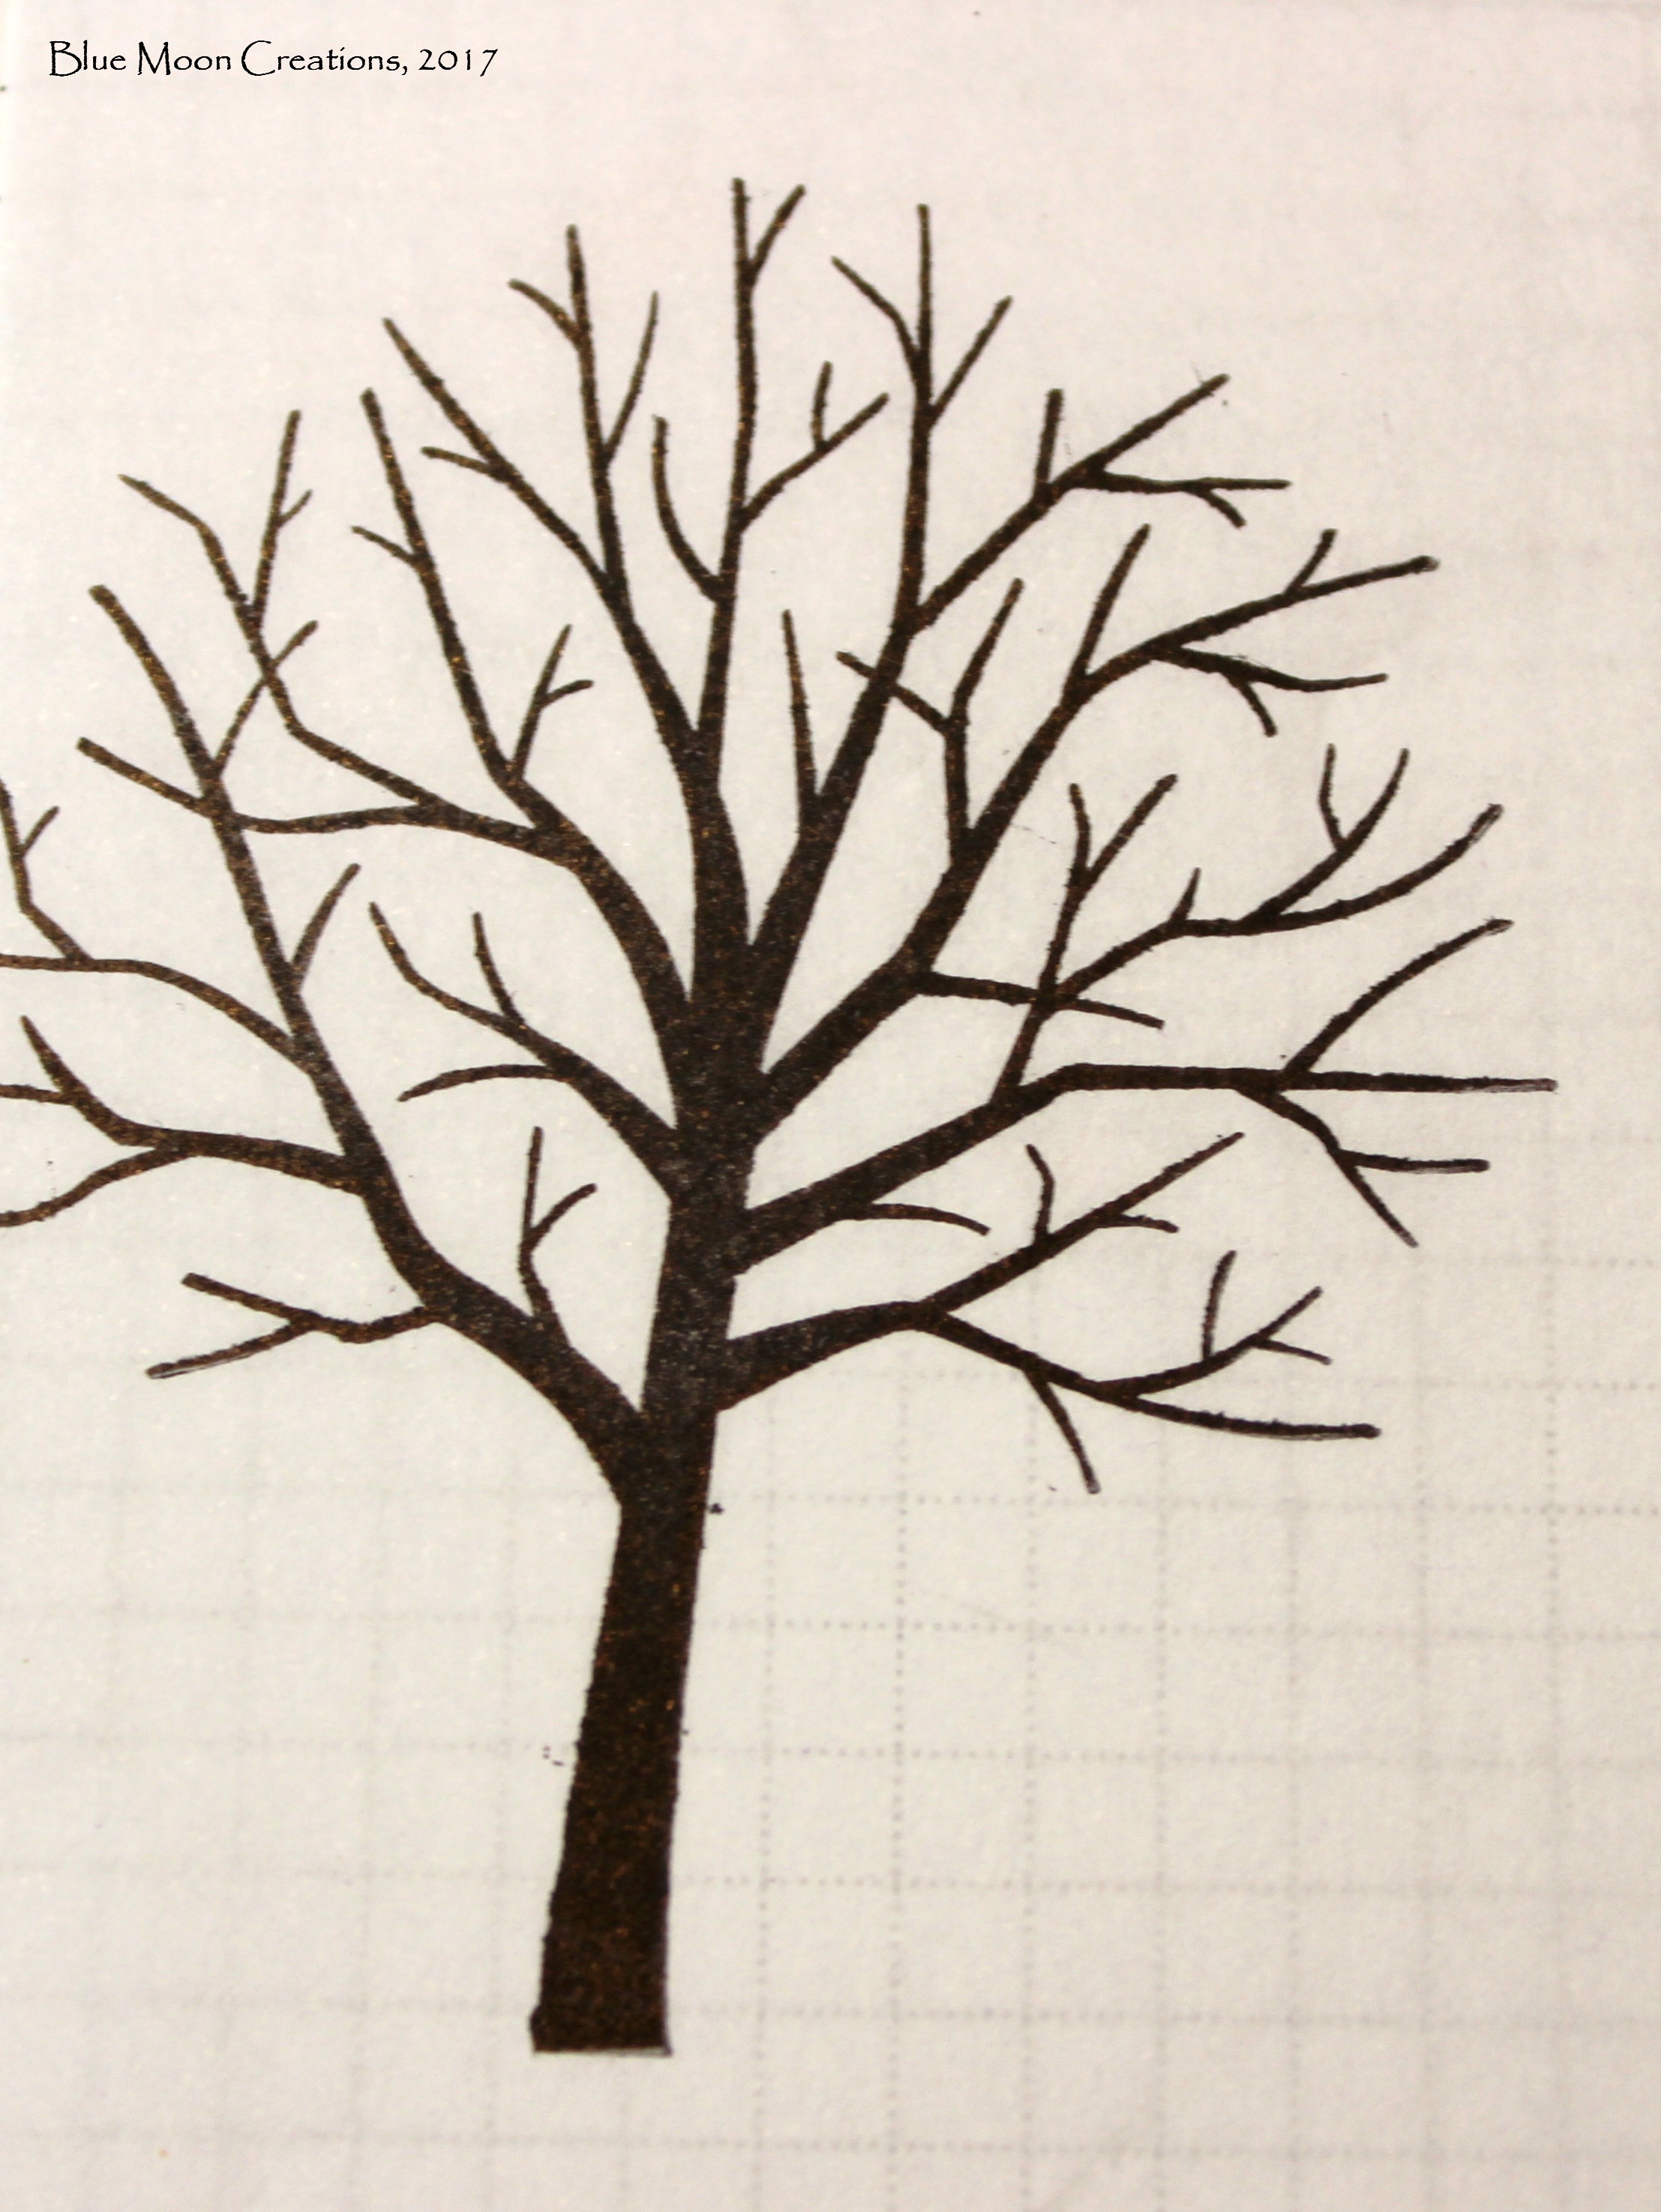
2. Normally, your background would be abstract. But, for this card, I wanted my background colors to be centered around the branches of the tree. Since I needed to have an idea where the branches are in relation to the transparency, I first
stamped the tree image on the tissue paper backing that comes with the transparency using Archival Black ink.
|
|
|
| |
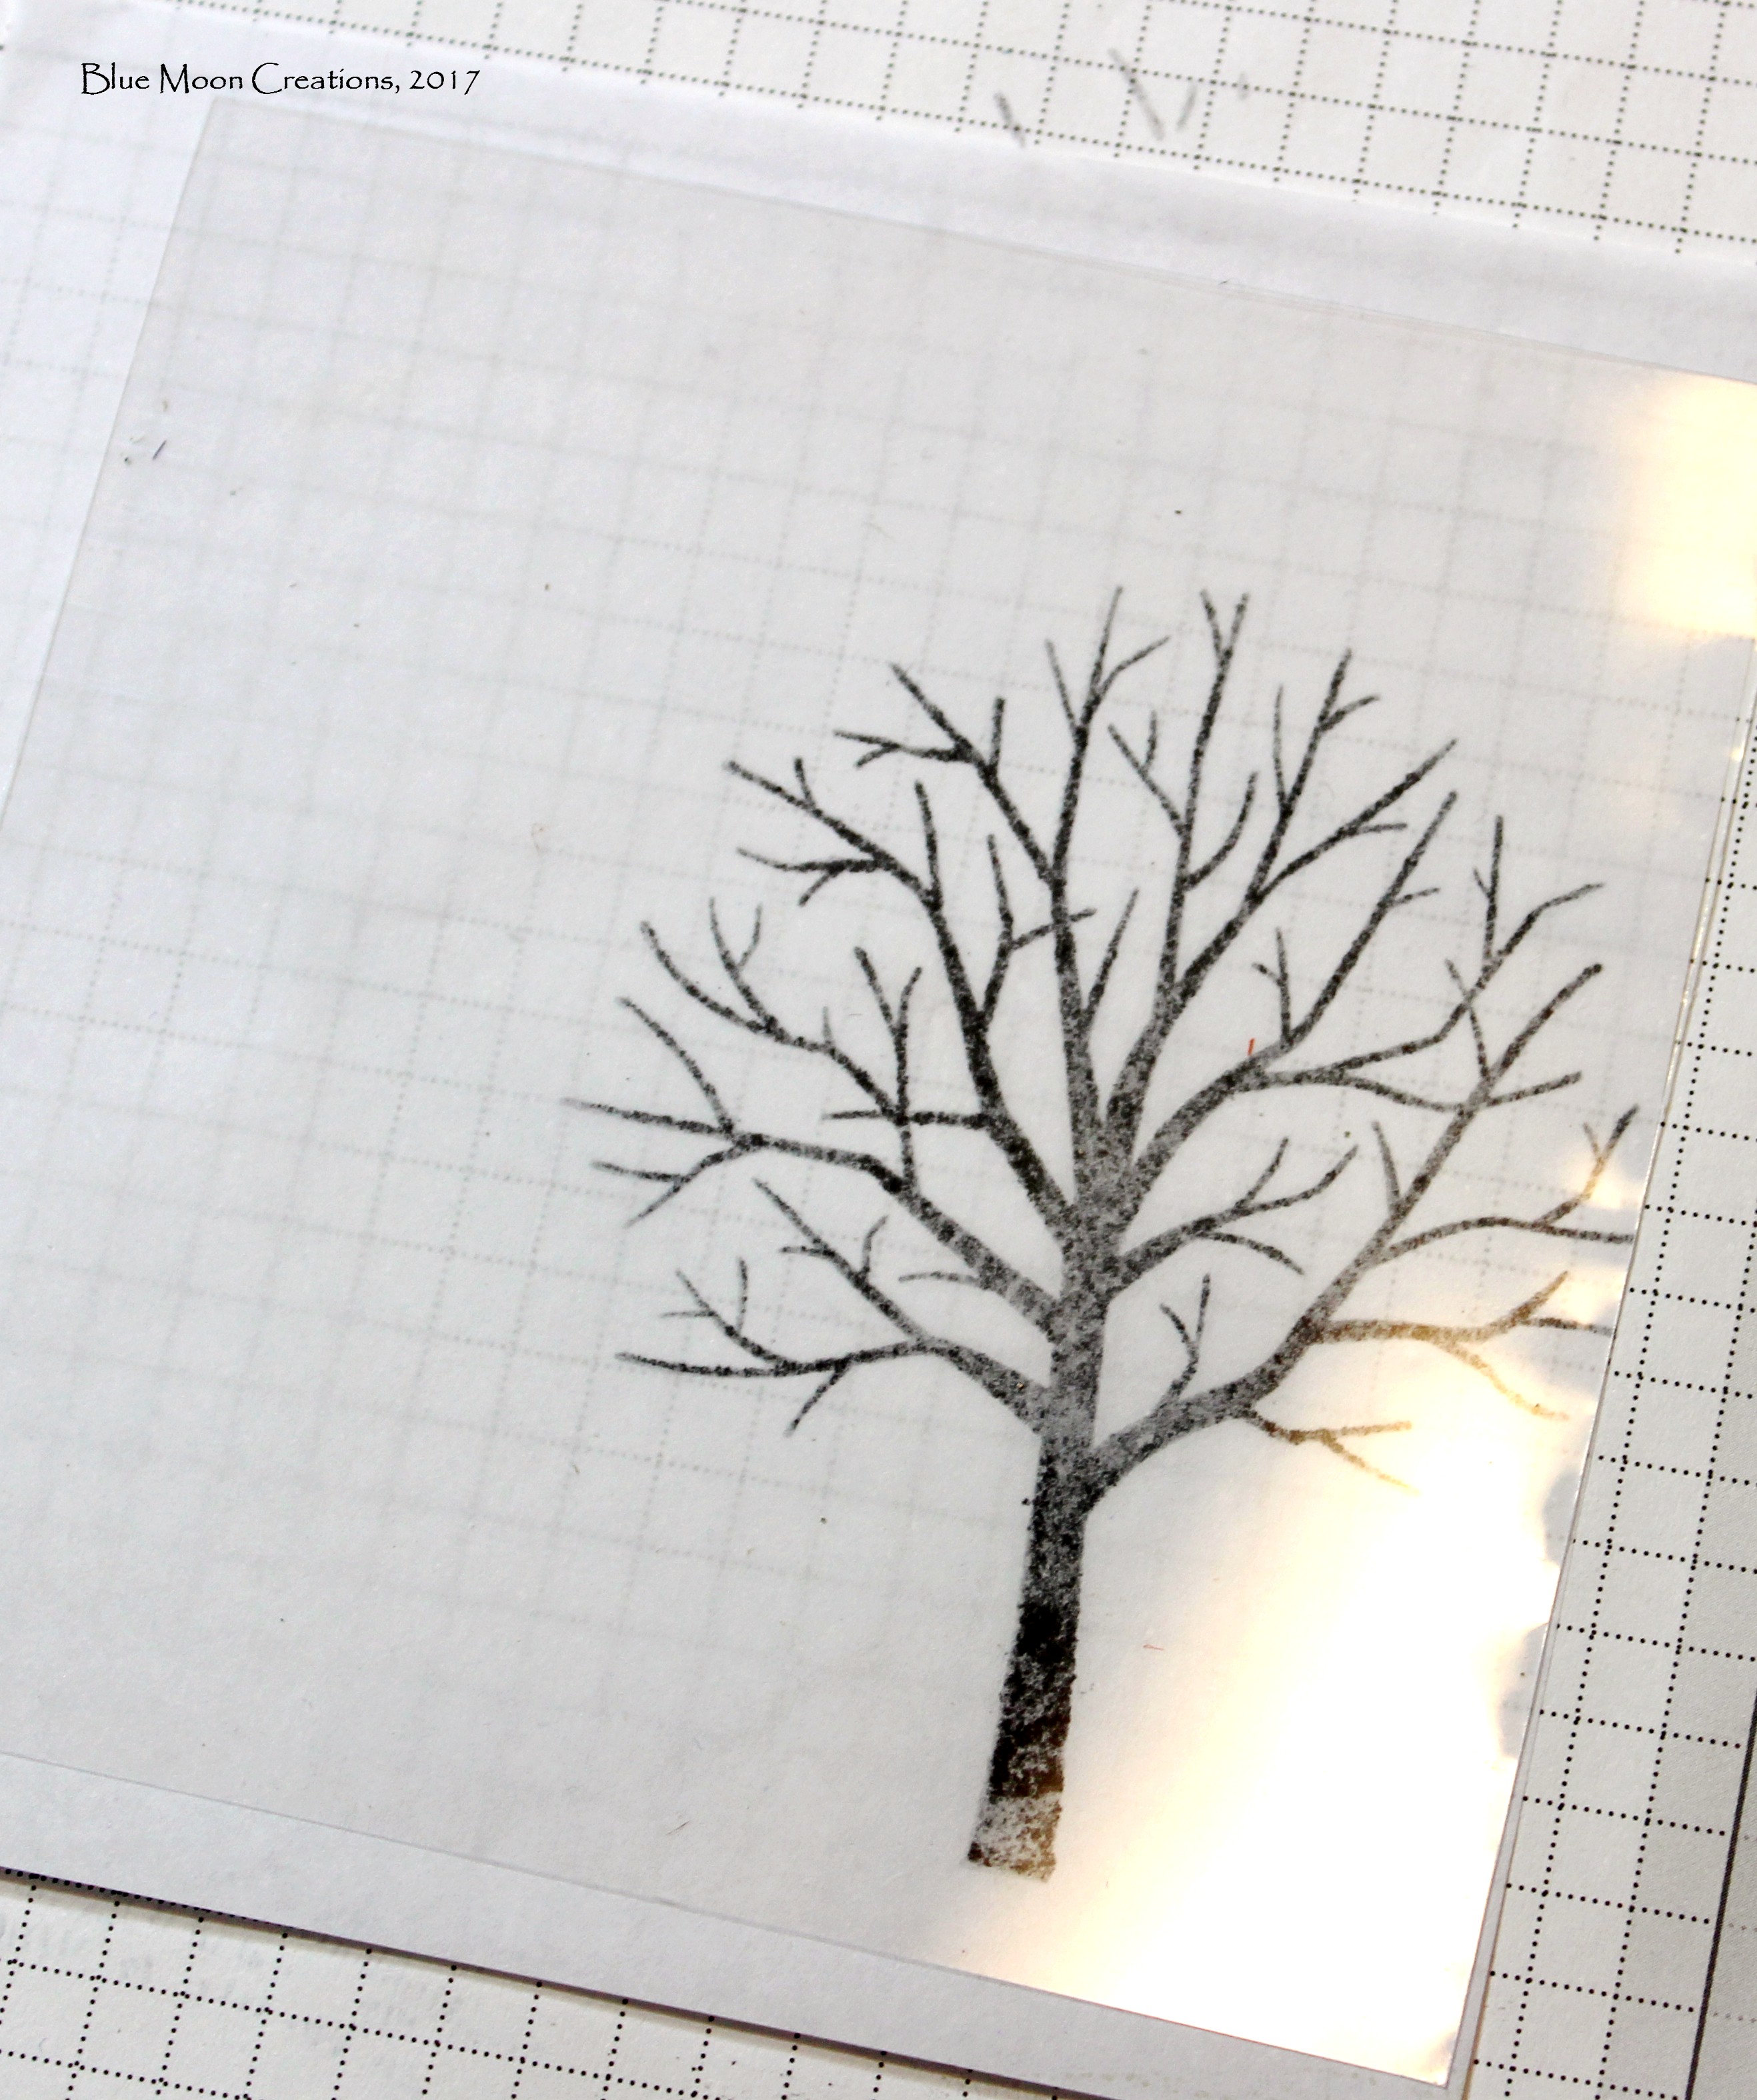
3. Cut a window or transparency sheet a little bit larger than your card front.
For this card, I turned the stamped tissue paper over and placed the transparency sheet on top of it. I did this so the color that I add will be on
the right hand side of the back of the transparency. When I flip it over to apply the ink to the stamped card front, the color will be correctly placed on the left hand side of the card front.
|
|
|
| |
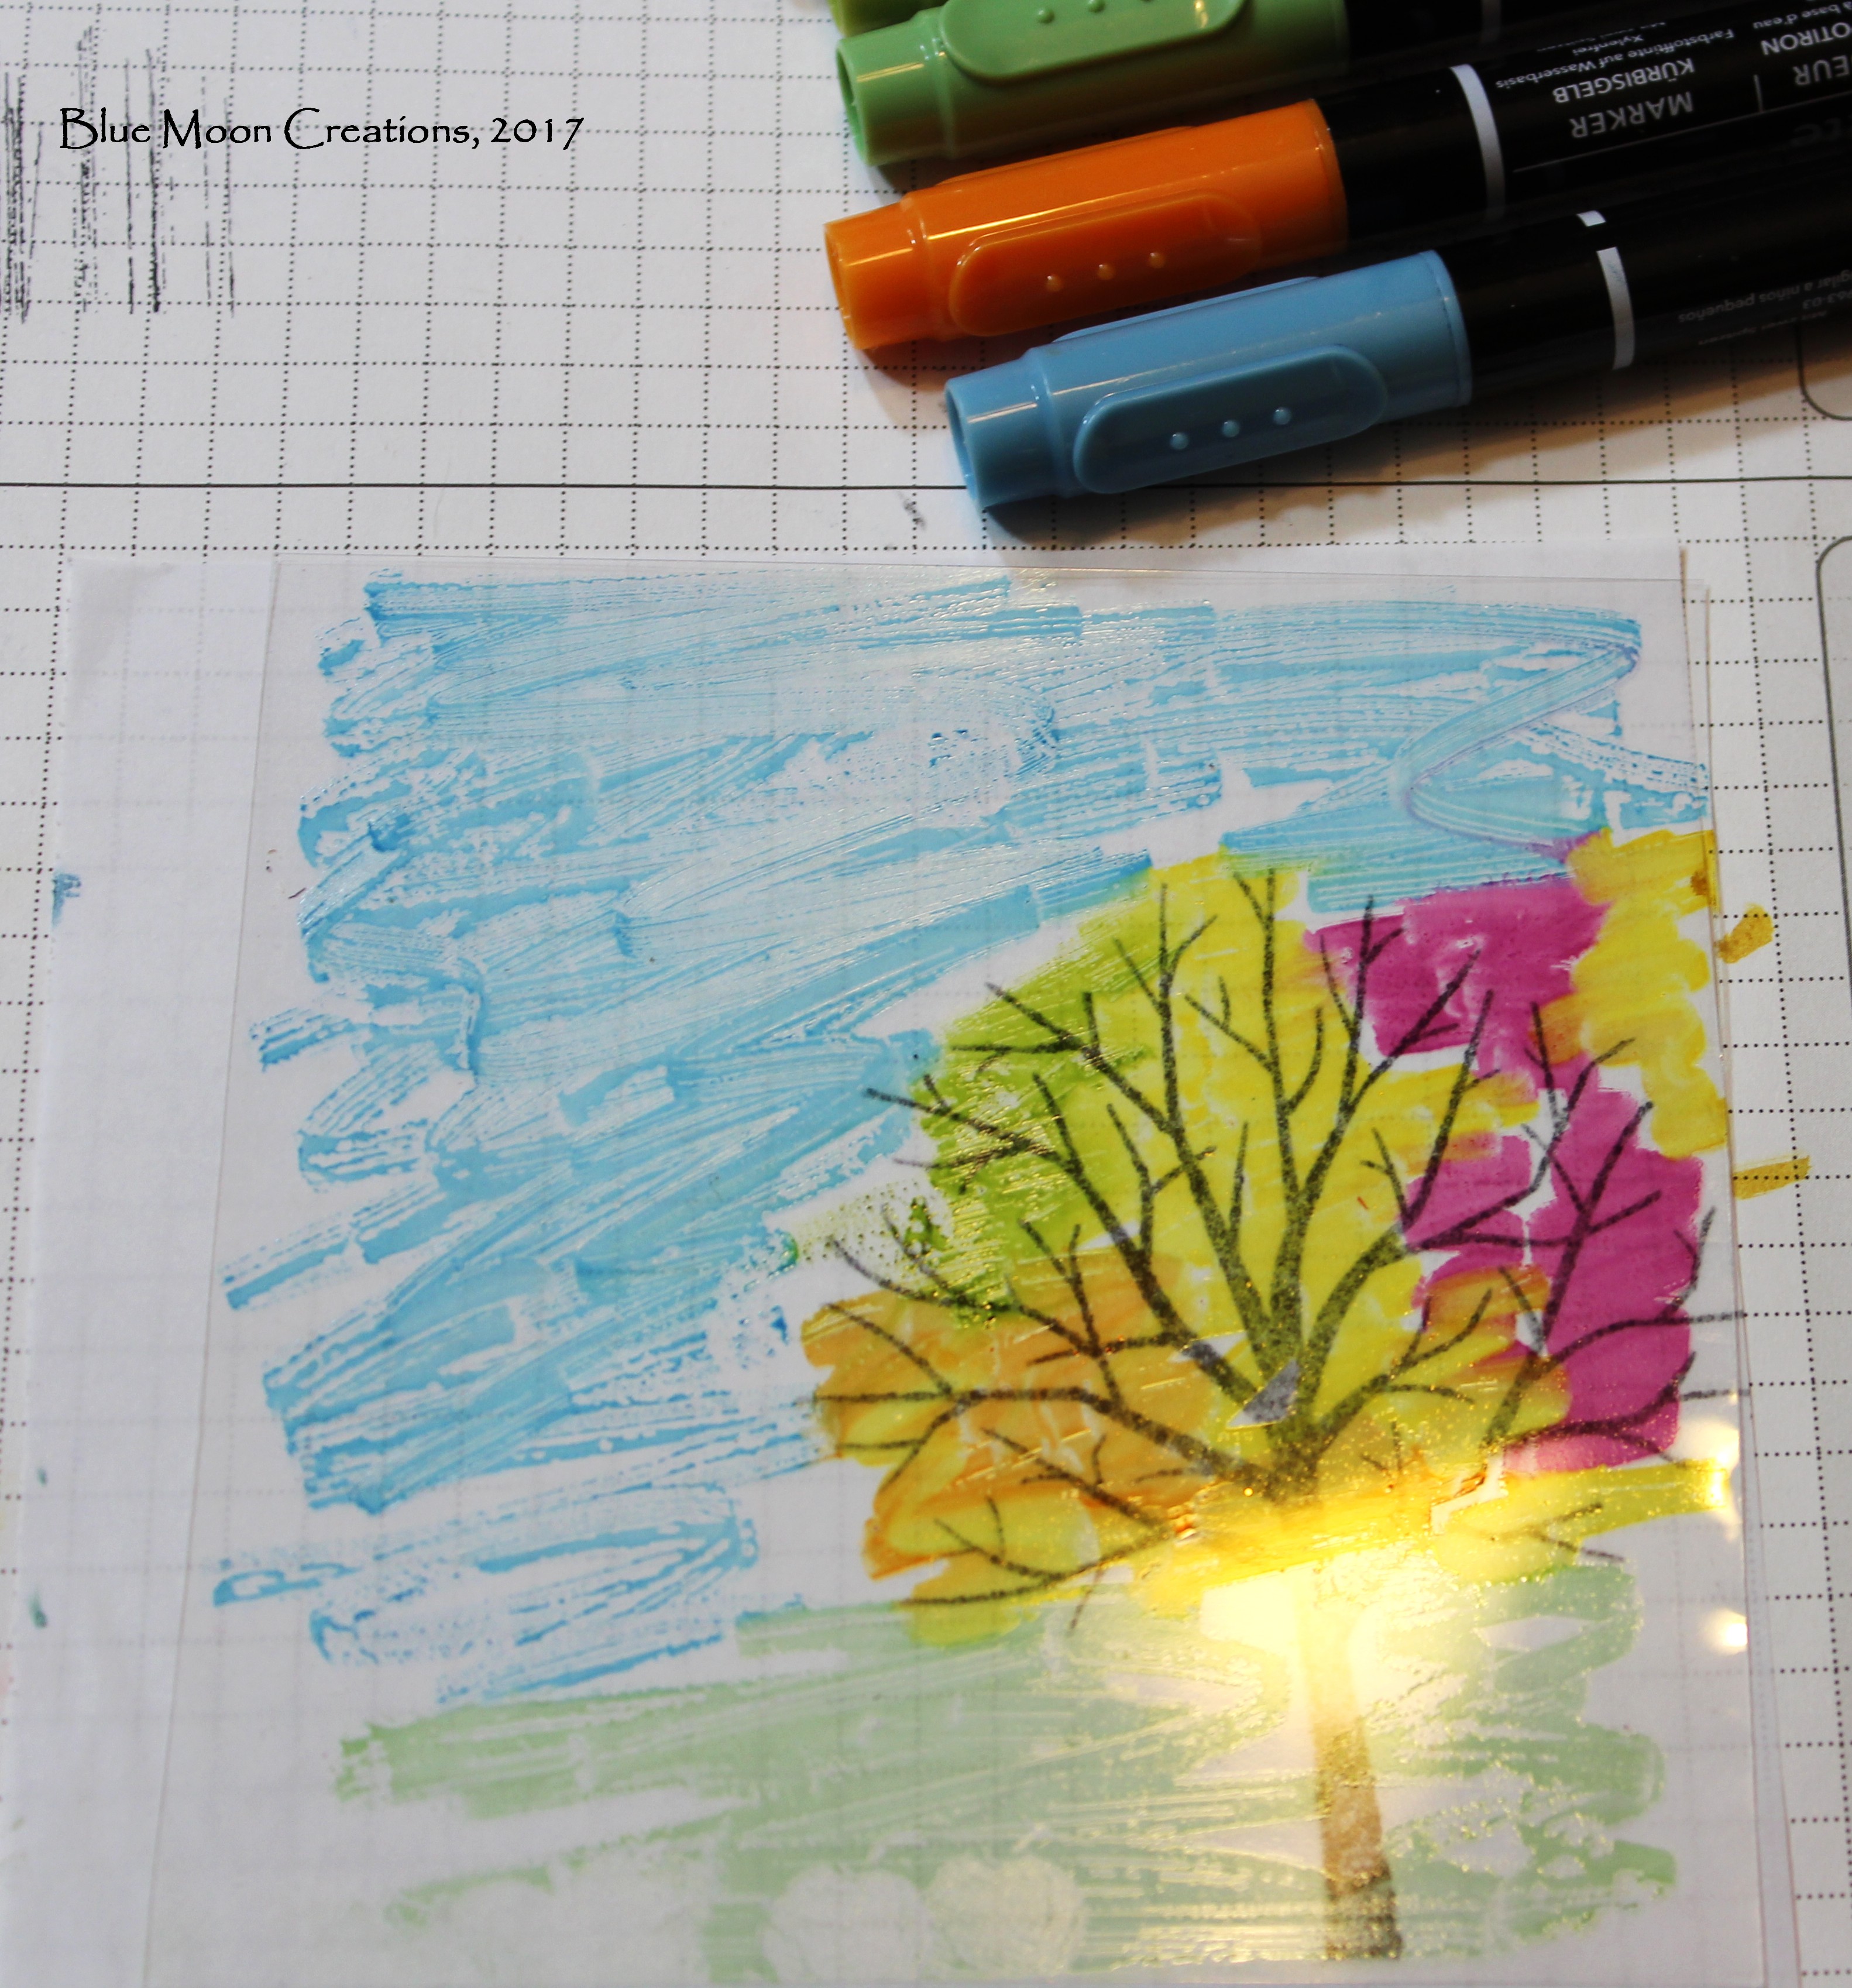
4. Add color to the window or transparency sheet using markers or ink refills.
For this card, I scribbled on Marina Mist, Pool Party, Rich Razzleberry, Crushed Curry, Old Olive, Pumpkin Pie, and Wild Wasabi Stampin' Write Markers.
You can see
how I used the stamped image underneath the transparency sheet to place my colors. The blues at the top for the sky, greens at the bottom for the ground and the mix of fall colors around the branches.
|
|
|
| |
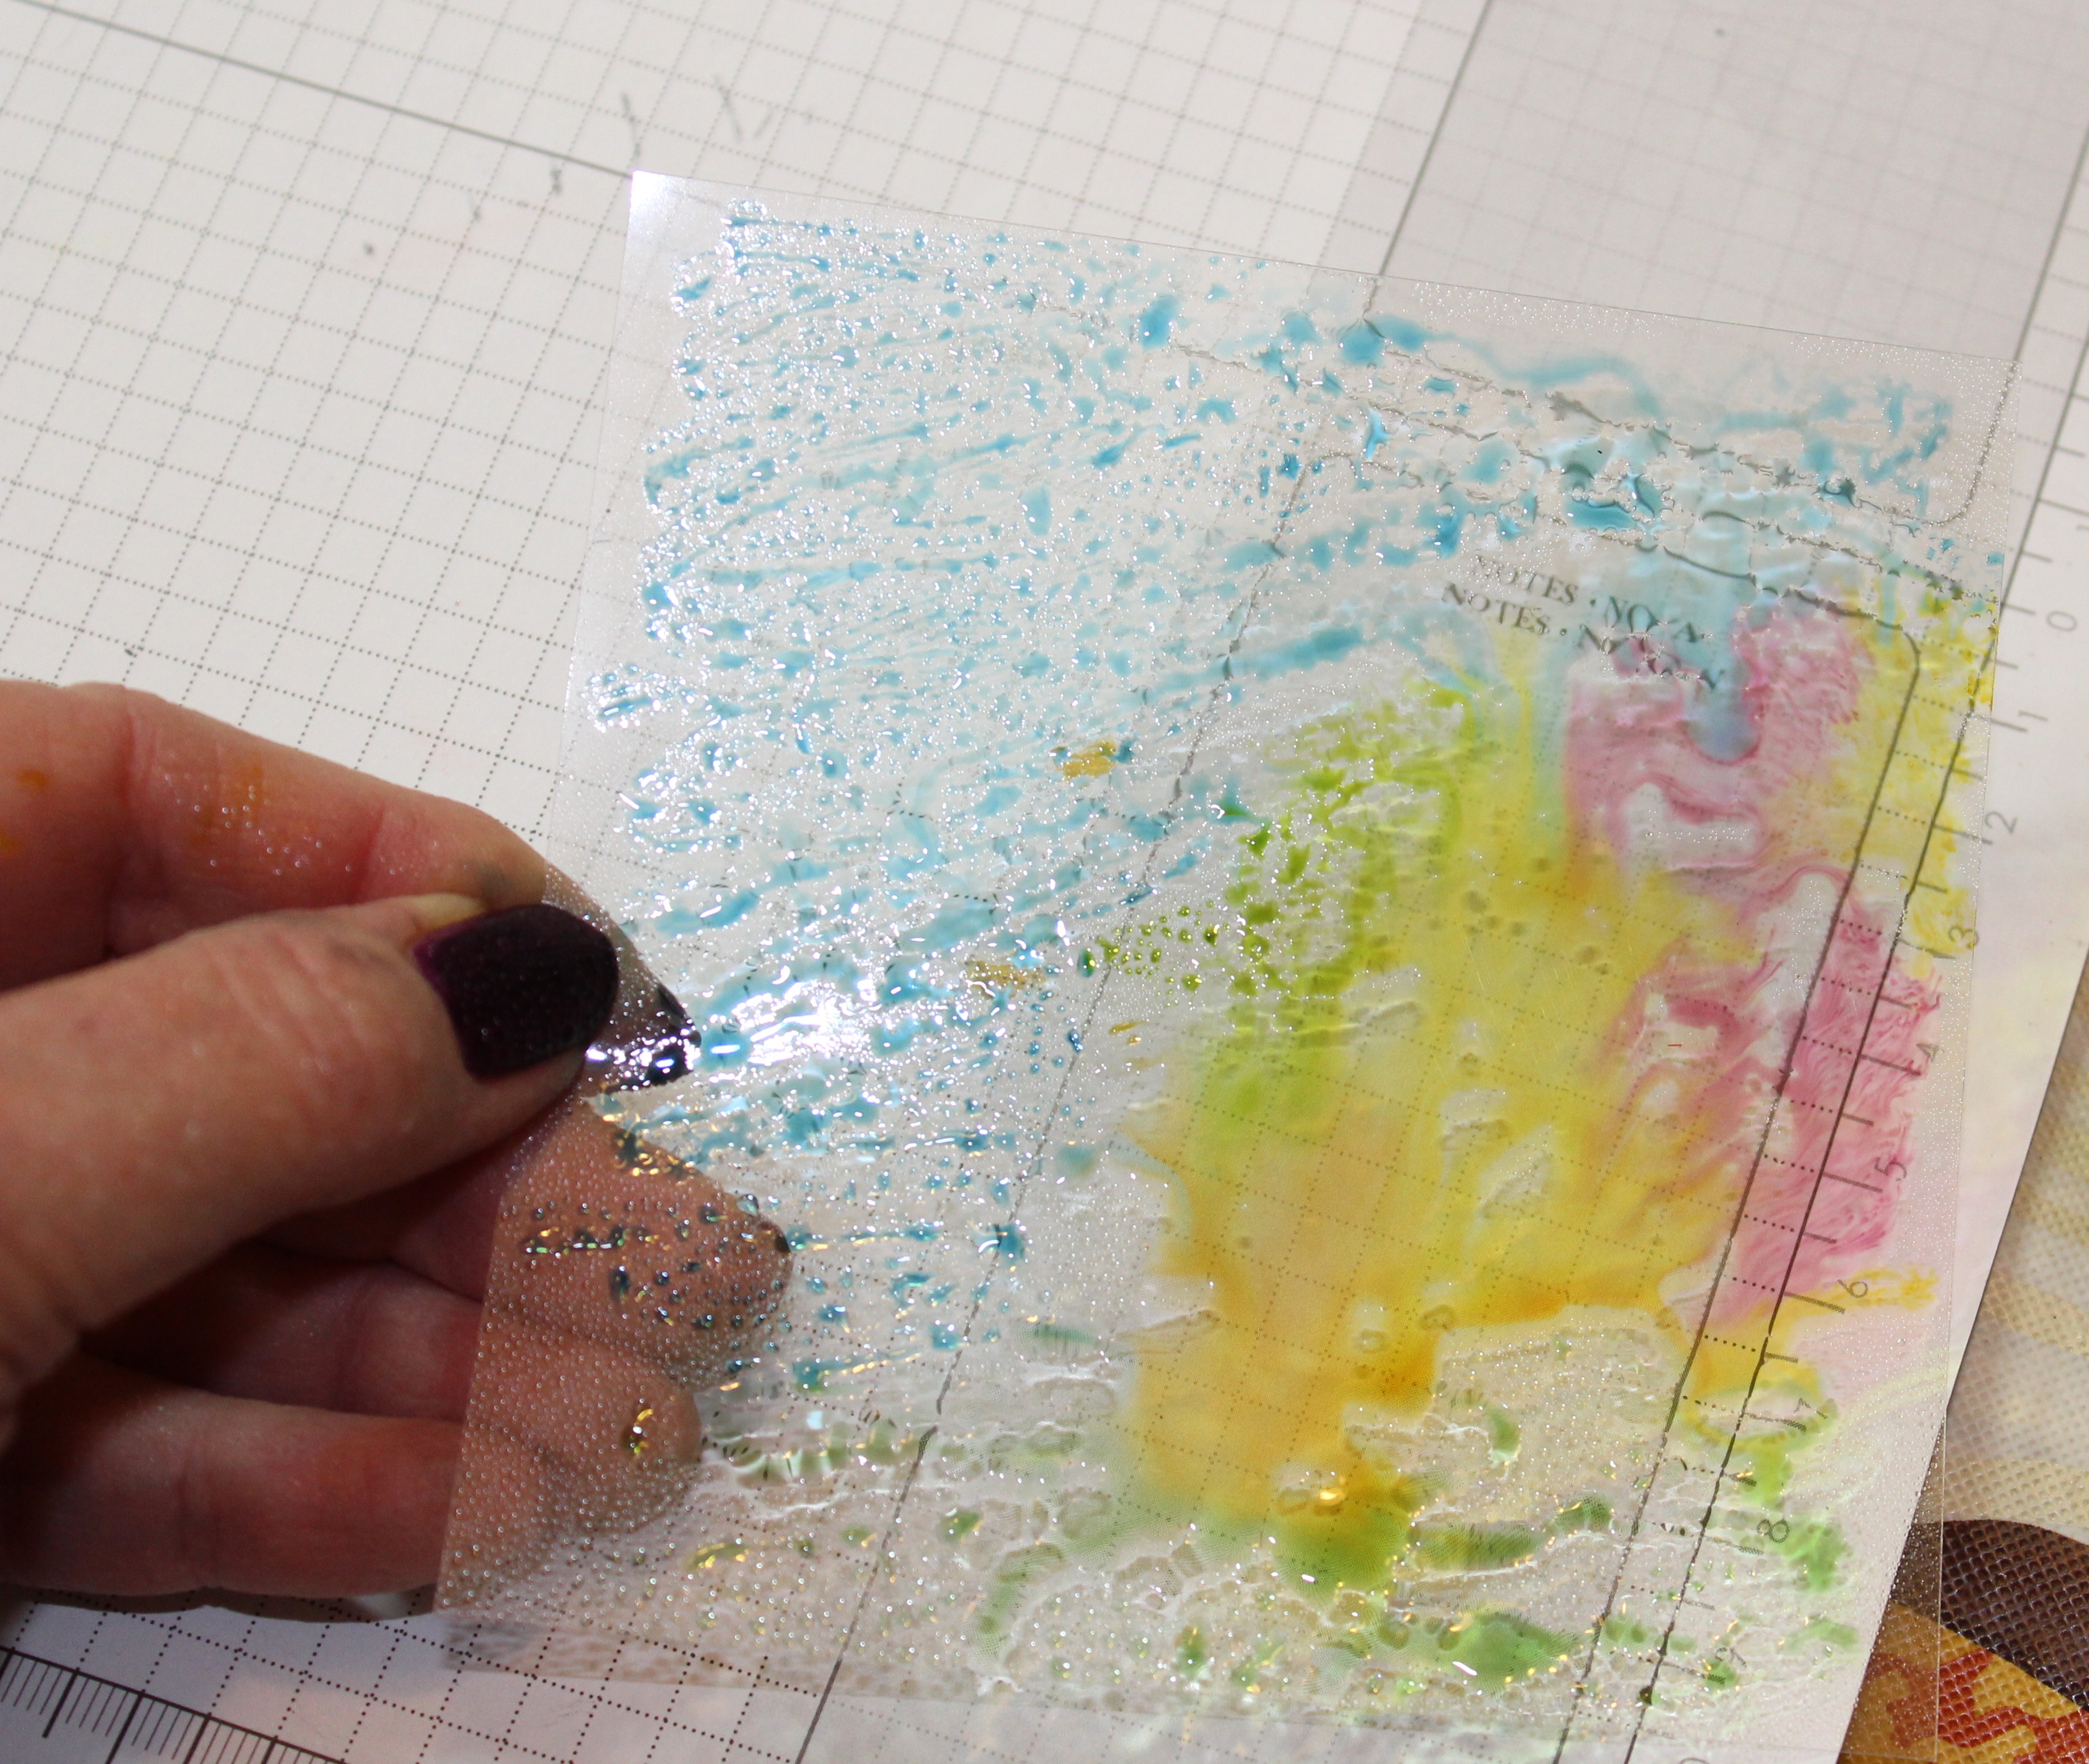
5. Spritz colors using a spray bottle filled with water. The colors will pool and begin to run.
|
|
|
| |
6. Turn the window or transparency sheet over and place on top of the stamped card front. With your fingertips, press the colors onto the card front.
|
|
|
| |
7. Remove the window or transparency sheet and set piece aside to dry completely.
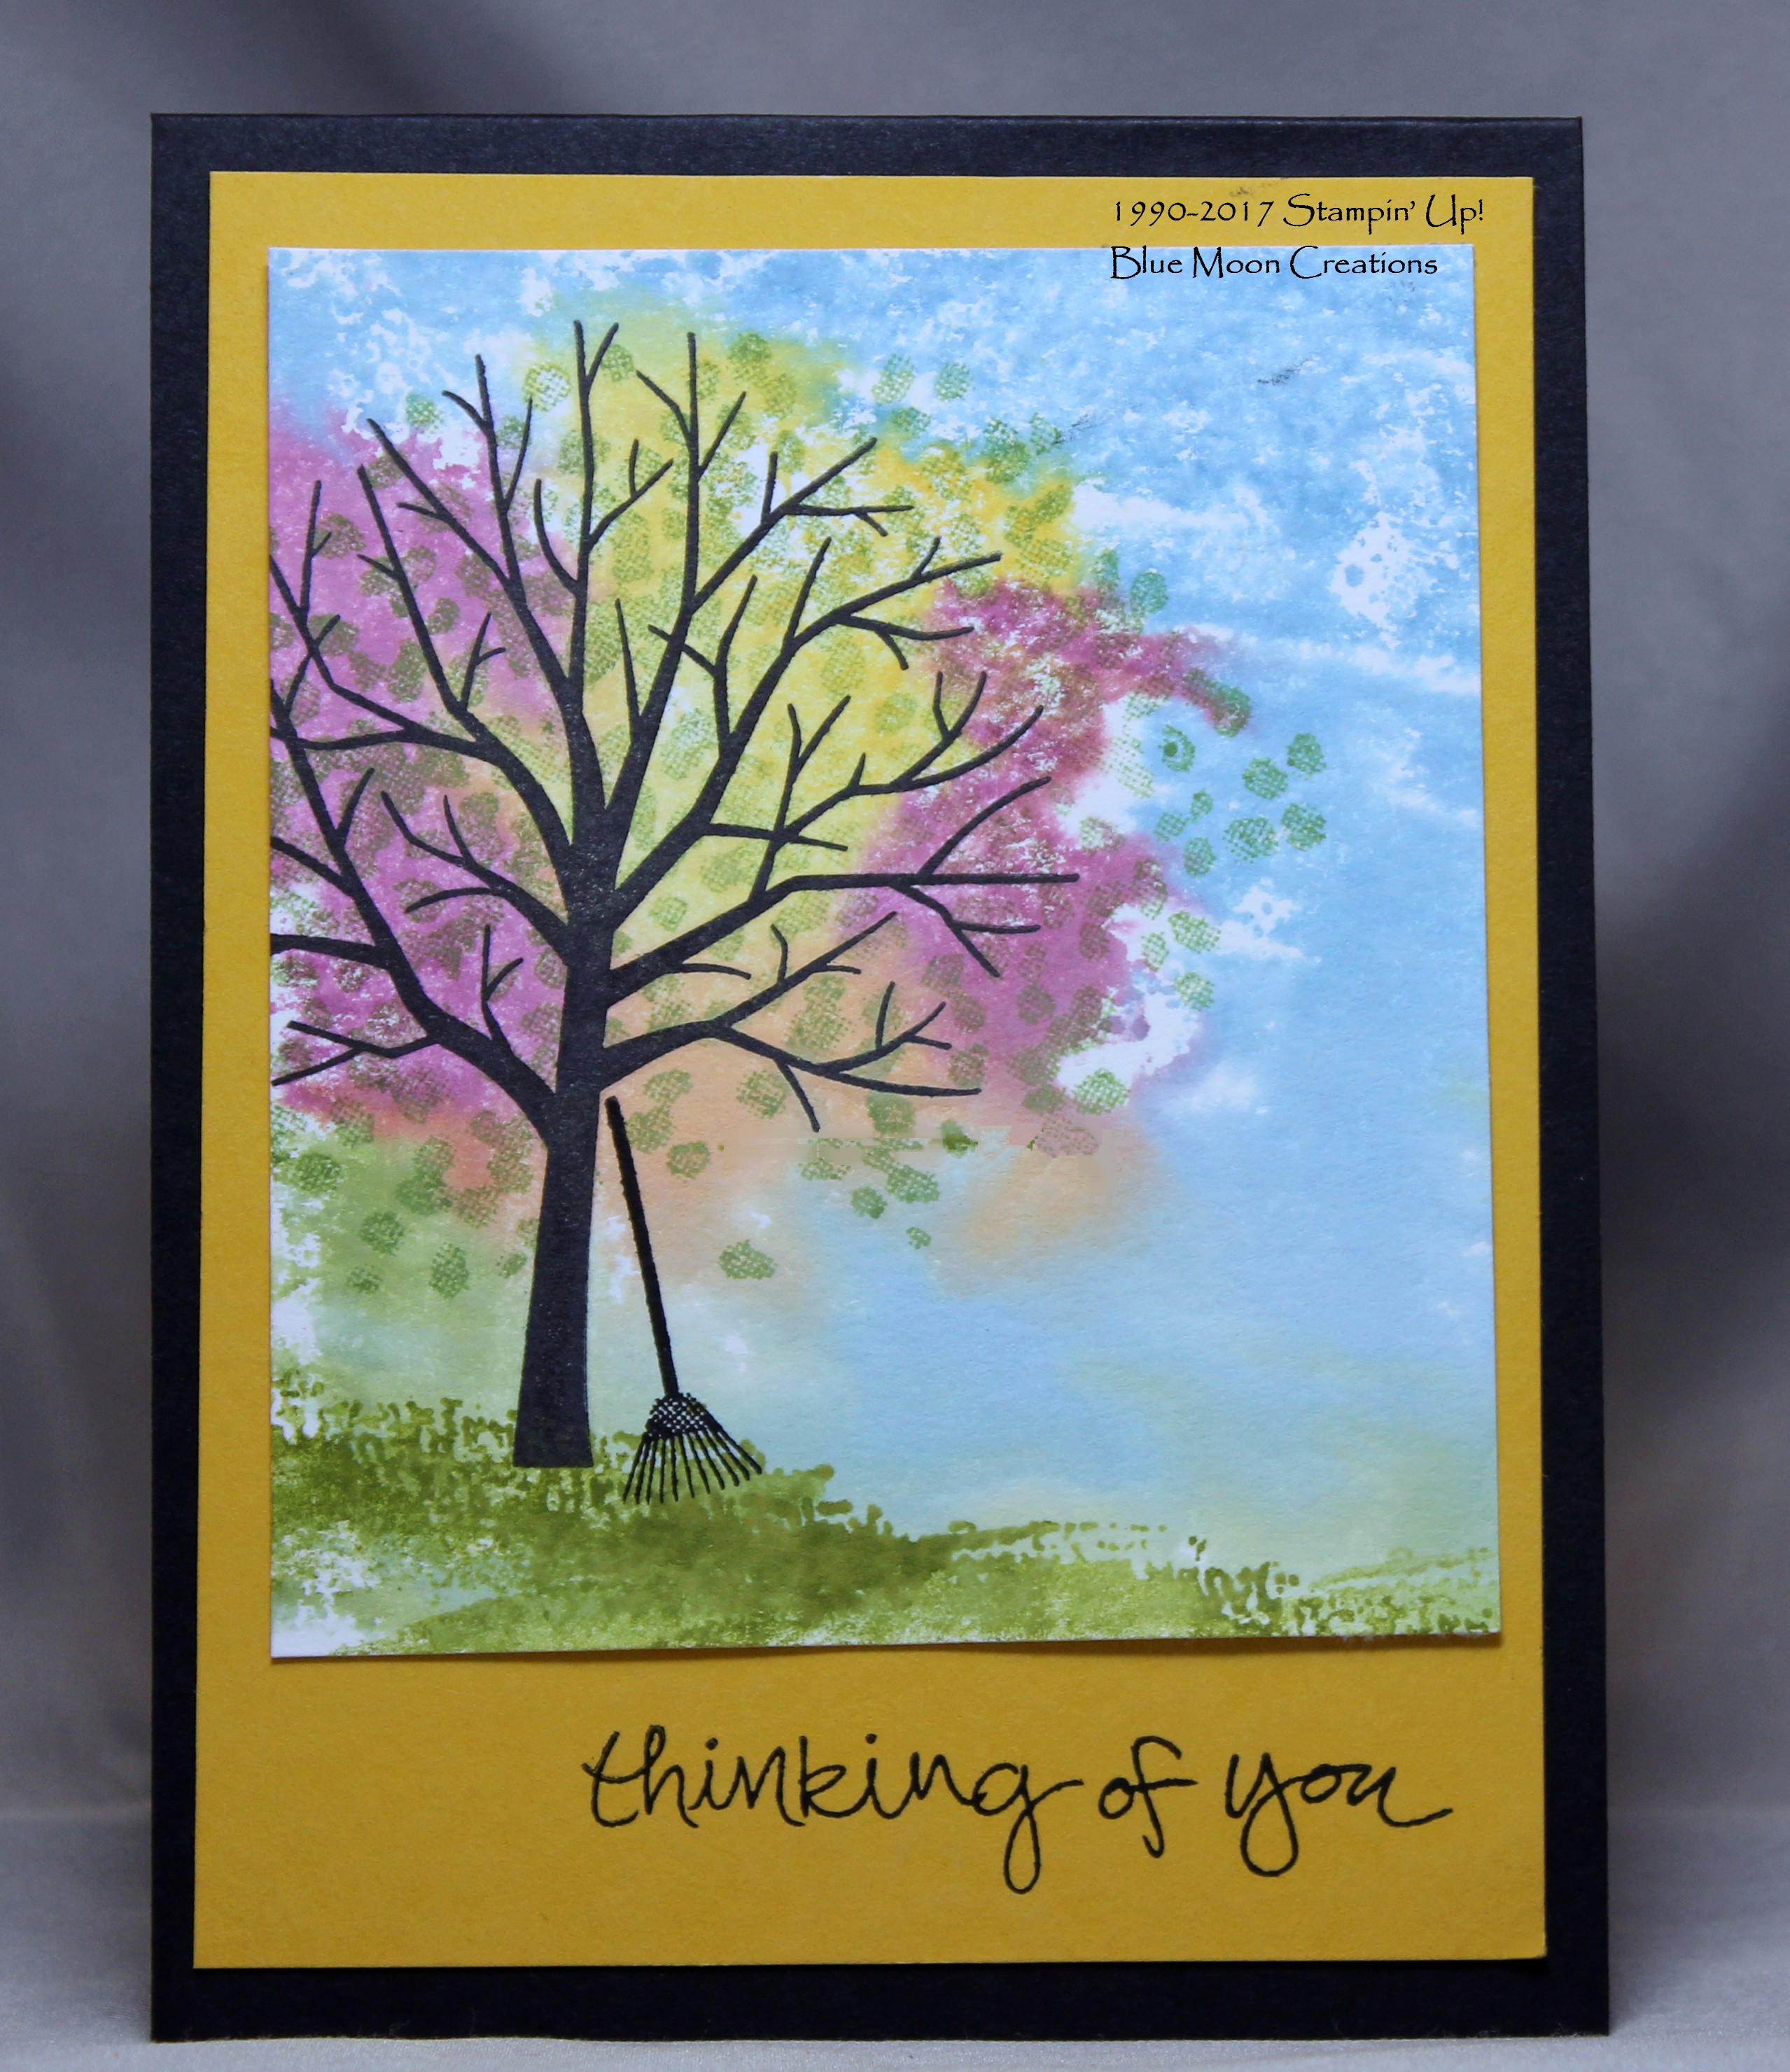
8. To add more definition to the leaf color on the card front, I inked up the leaves image from Sheltering Tree in Wild Wasabi ink, off stamped, then stamped over the branches. 9. Stamp ground
using Wild Wasabi ink. I stamped the image a couple of times, full strength and off stamped. 10. Stamp rake image using Archival Black ink. 11. Stamp smaller leaf image around rake using Old Olive ink. 12. Stamp greeting on Crushed Curry card mat using Archival Black ink. Attach to Basic Black card base. 13. Attach Smackin' Acetate piece to front of card to complete.
You will notice
that the colors are more muted using glossy card stock. Card size is 3 3/4" x 5"
|
|
|
| |
Here is the same design, but using Whisper White card stock. You can see that the colors are more vivid than the glossy card stock version.
Have fun with this technique. Happy Stamping!
Supplies Used: Stamp Set: Sheltering Tree Ink: Archival Black, Wild Wasabi, Old Olive ink pads, Marina Mist, Pool Party, Rich Razzleberry, Crushed Curry, Old Olive, Pumpkin Pie, Wild Wasabi Stampin' Write Markers Paper: Basic Black, Crushed Curry, Glossy White or Whisper White Accessories: Window or transparency sheet, spritzer bottle with water
|
|
|
|
|
|