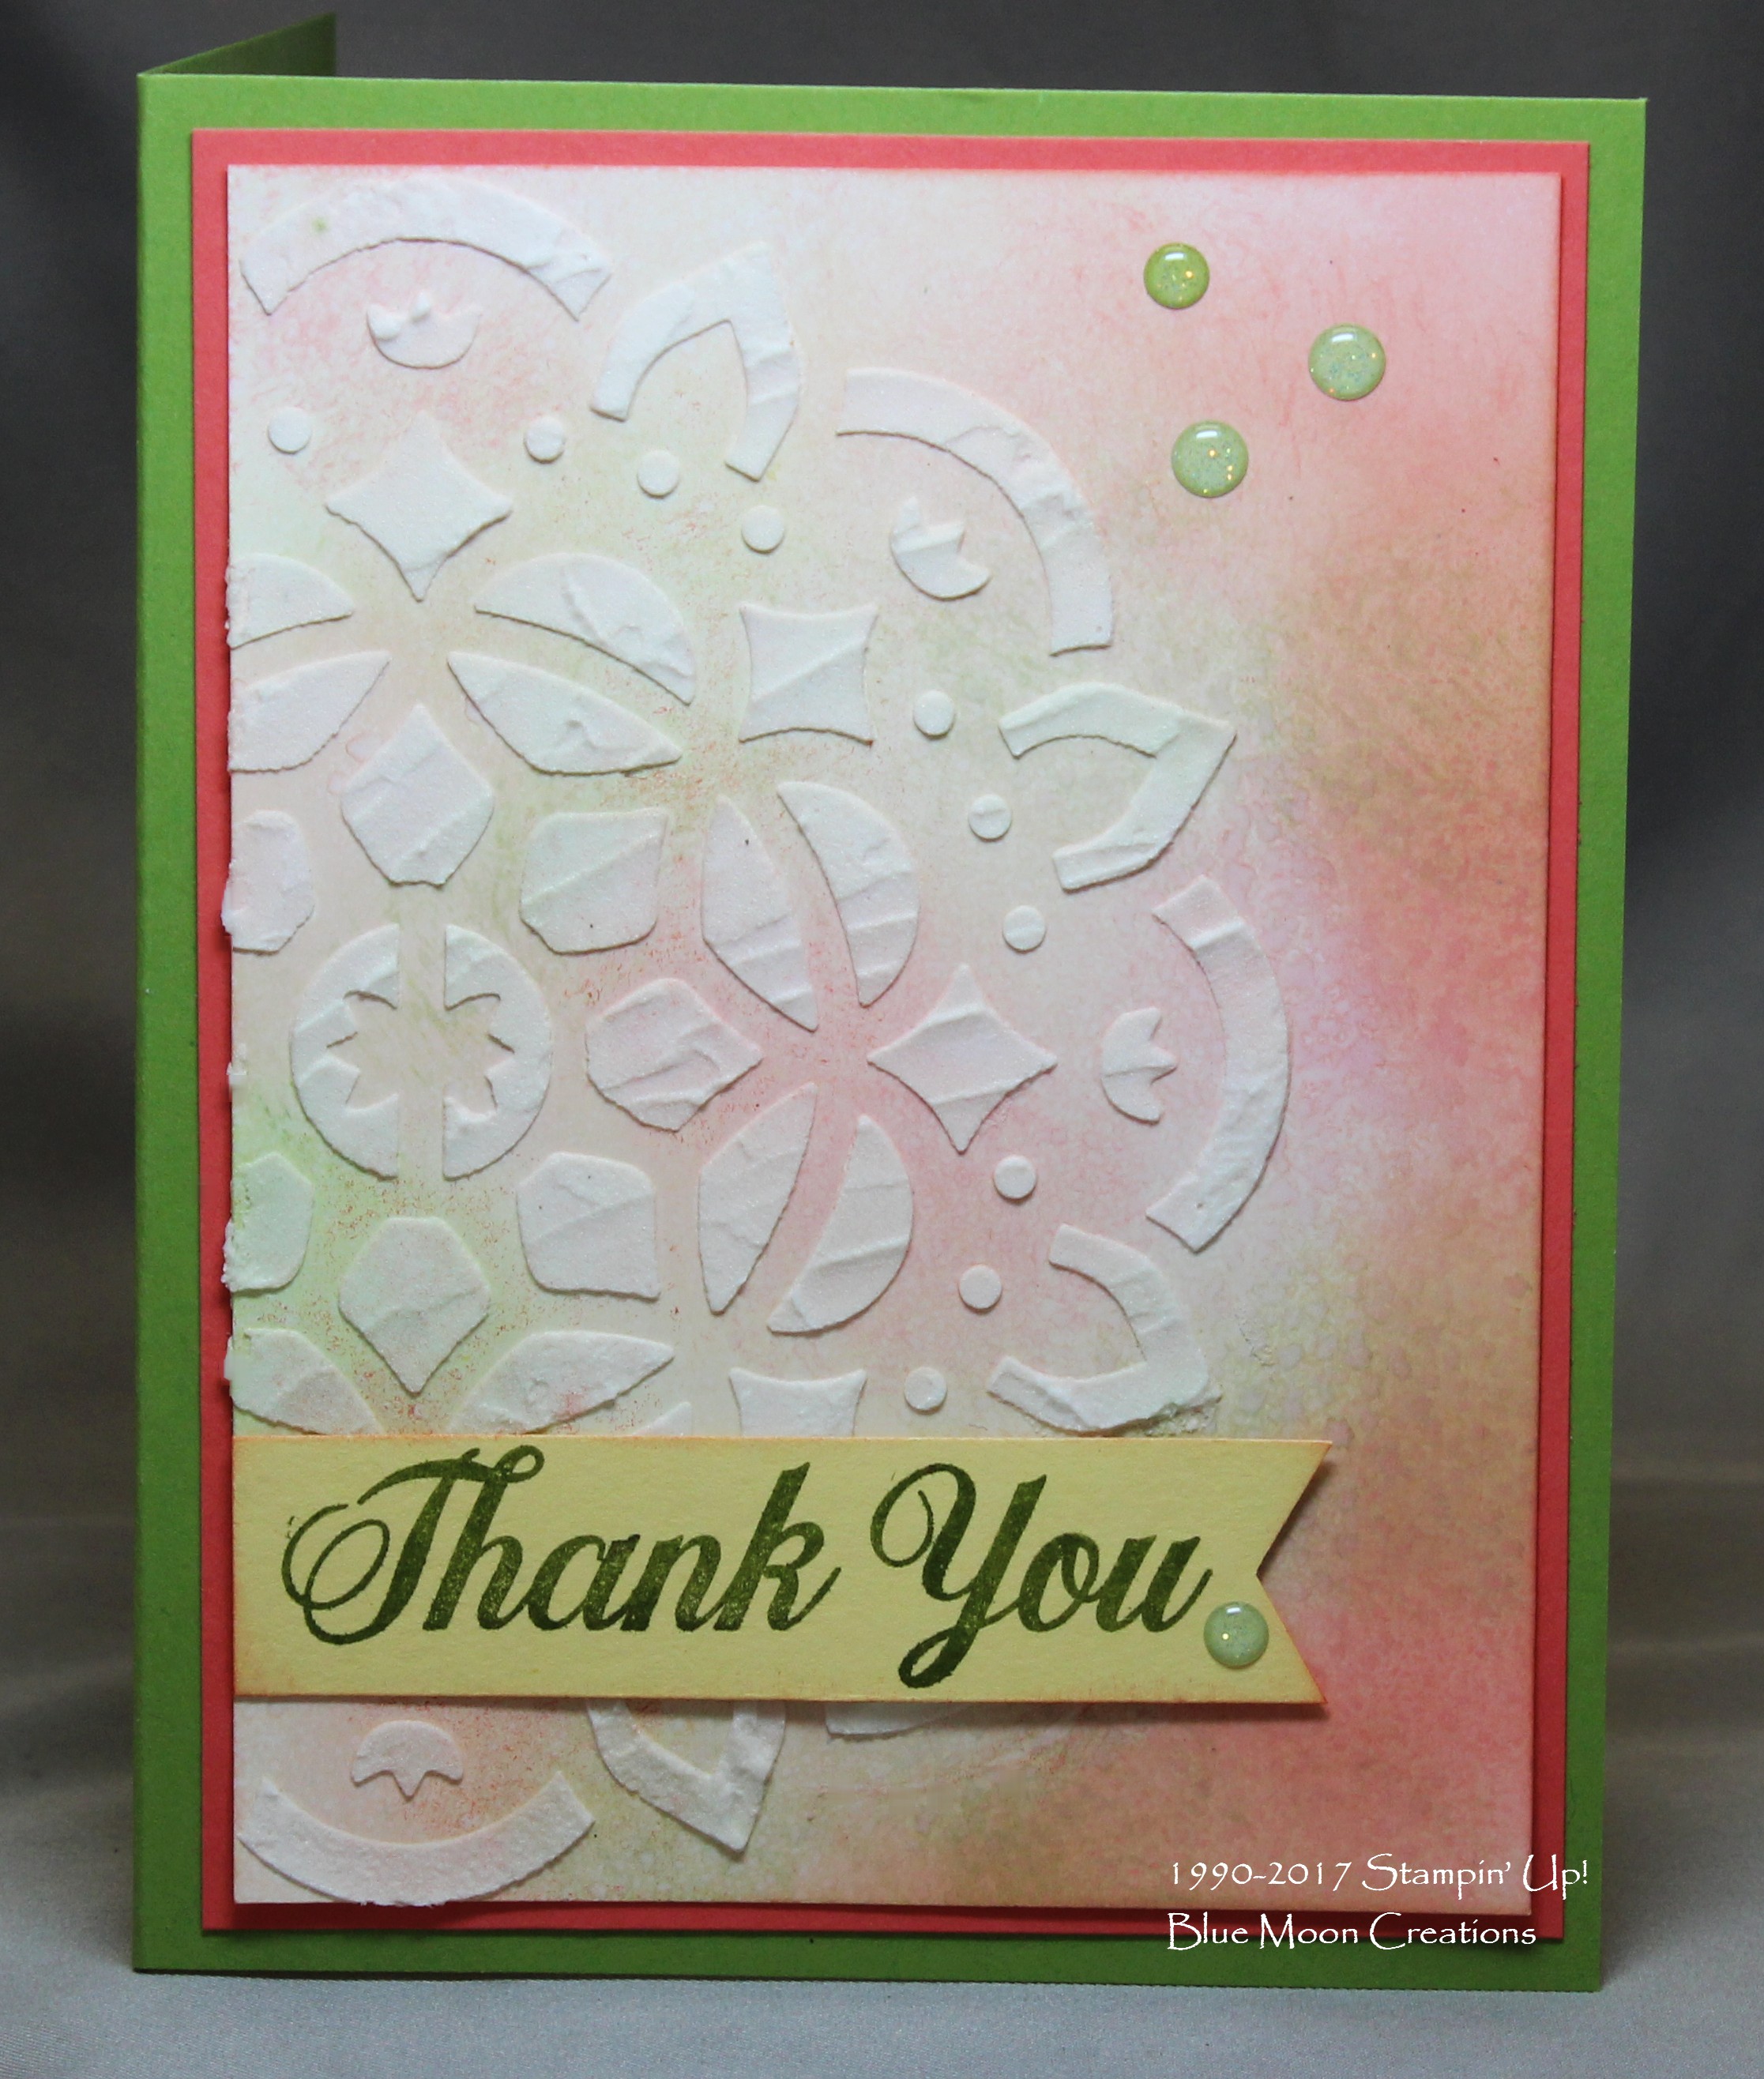
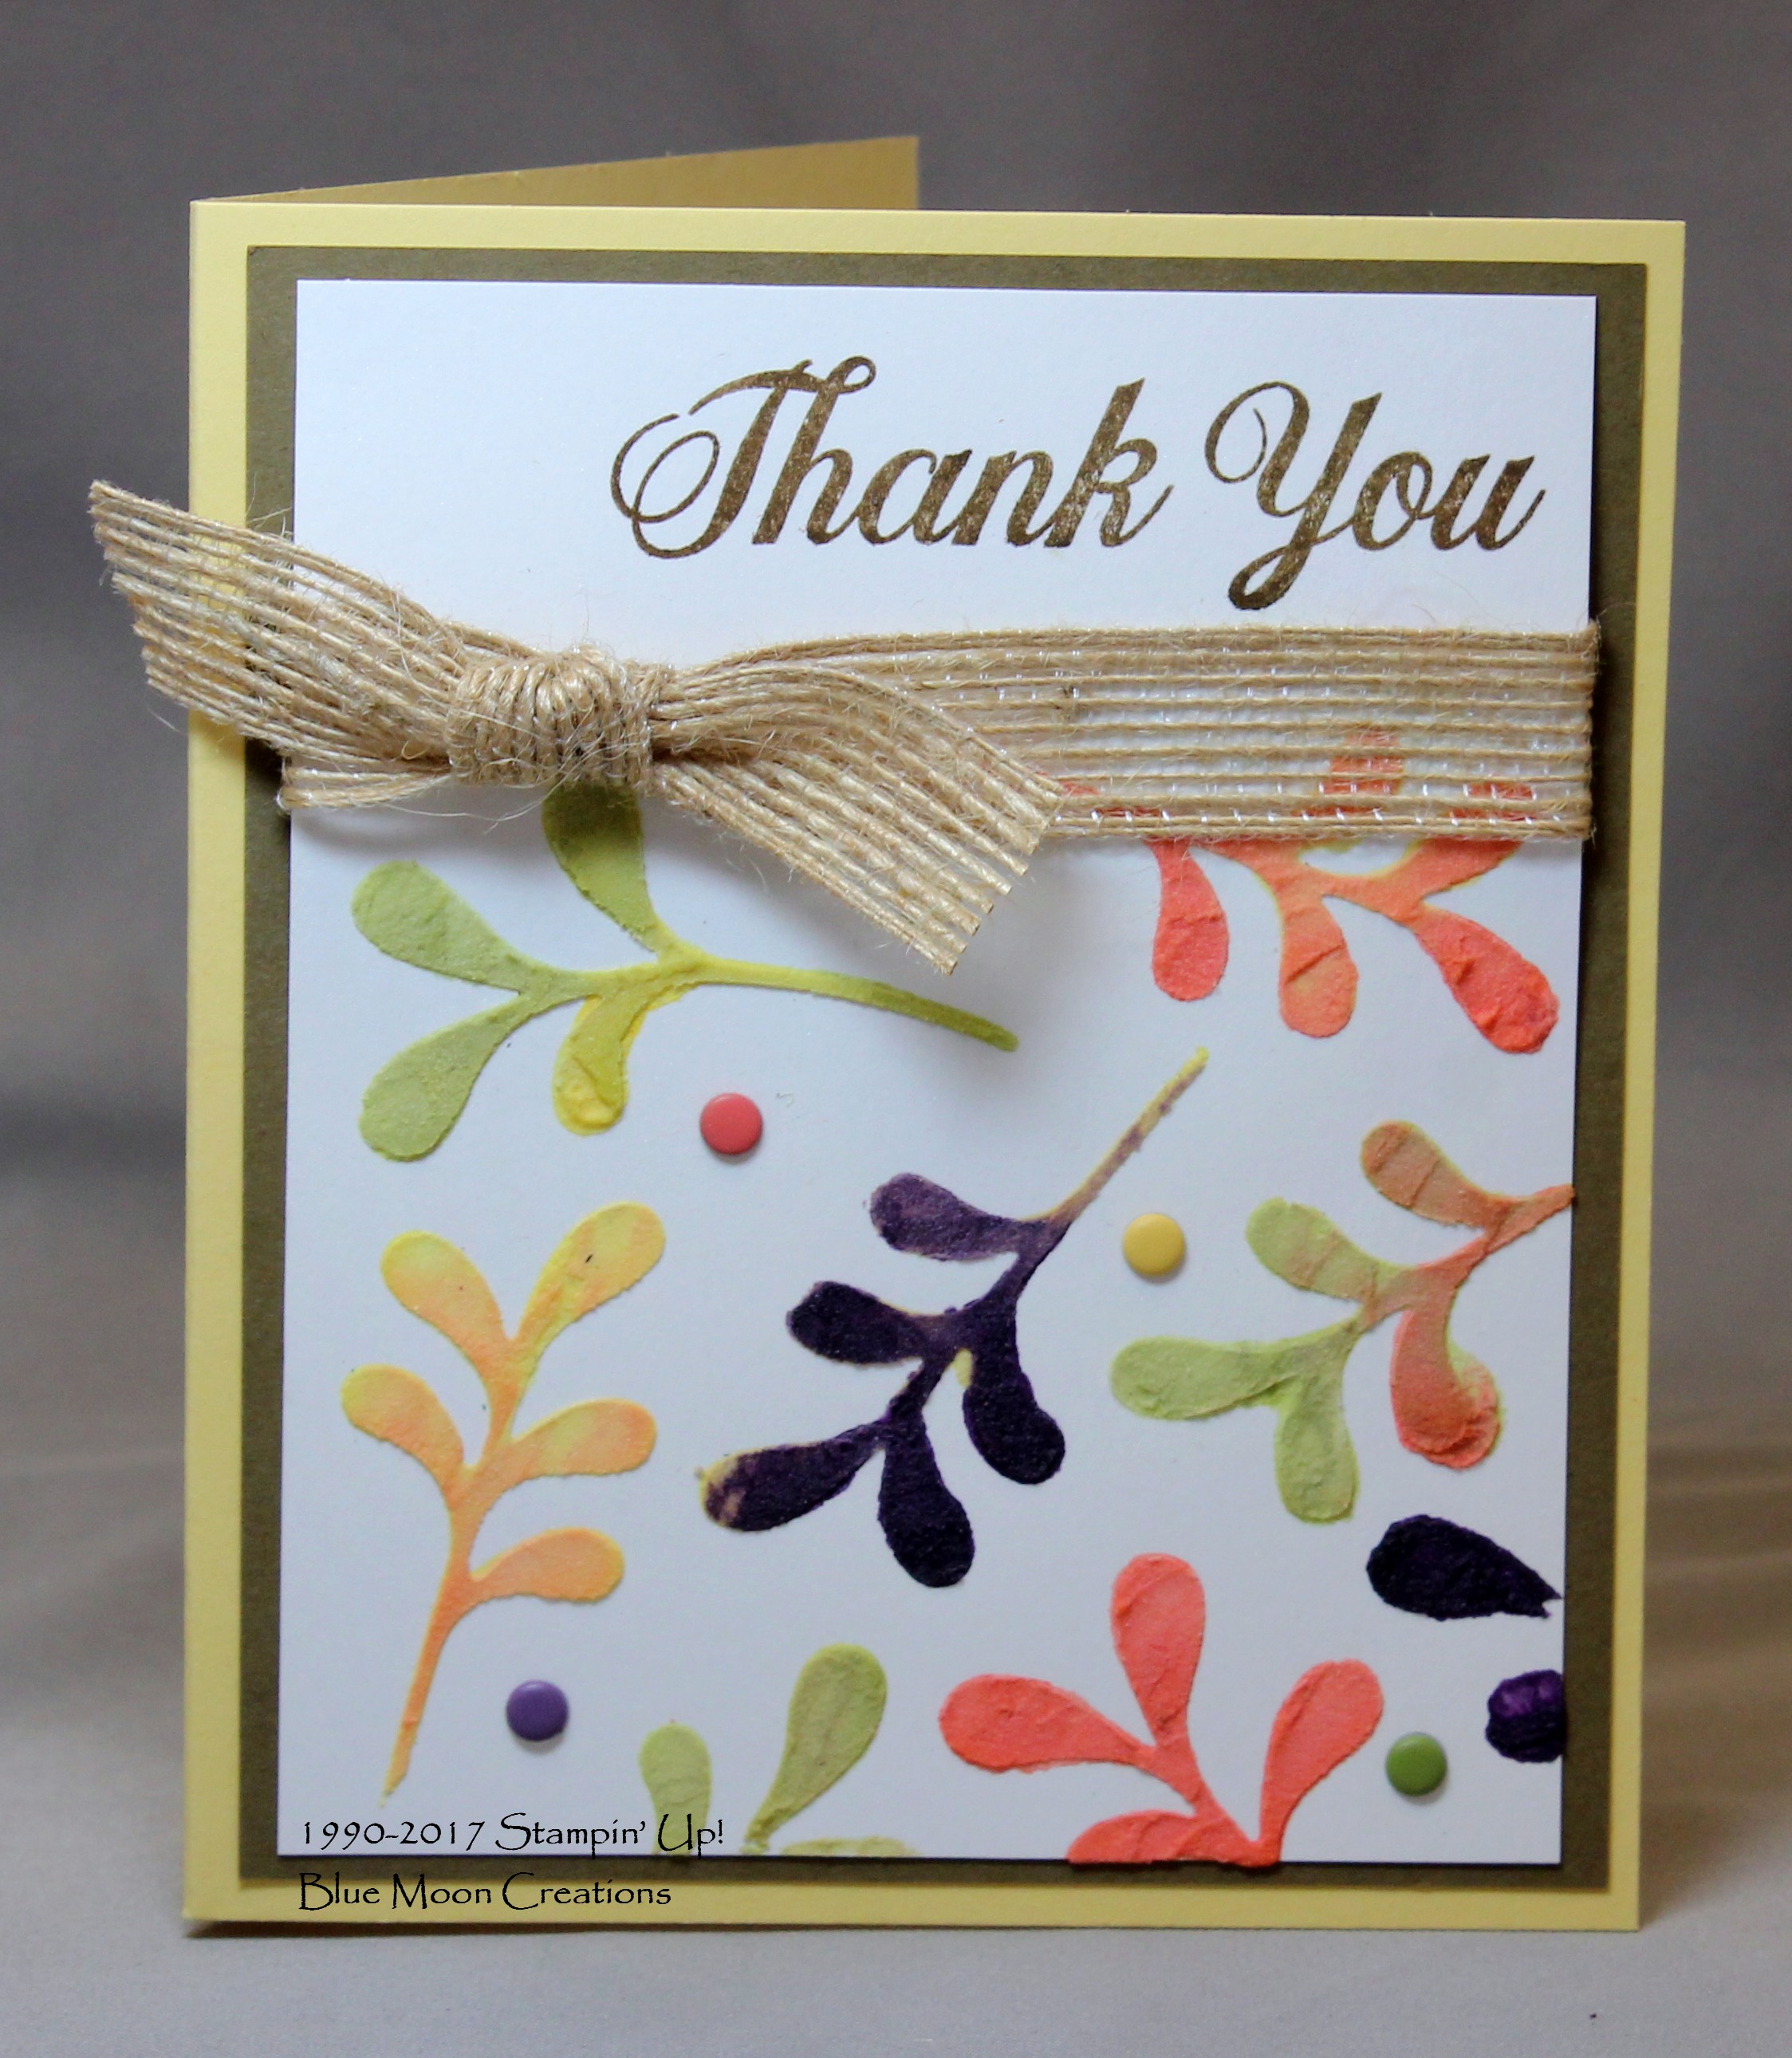
1. You can create stencils using punches, and framelits dies. I made my leaf stencil by cutting out several leaves using the Big Shot and Pretty Pines Framelits dies. I placed the two leaf dies onto a scrap piece of Whisper White card stock. I cut out two, then moved the dies, cut out two more, repeating that step a couple more times.
2. Secure stencil onto worksheet using a couple of pieces of washi or
painter's tape. Carefully slip Shimmery White card front underneath the stencil.
3. Scoop embossing paste out of the jar using palette knife and place four piles onto Silicone Craft Mat. Add a drop of Calypso Coral, So Saffron, Old Olive, and Elegant Eggplant ink refills onto each one of the piles. Mix with palette knife.
4. Lightly spread different colors onto the leaf stencil using
palette knife. You can mix colors if desired. Carefully remove stencil and set piece aside to dry completely.
5. Once dry, wrap piece of 5/8" Burlap Ribbon around the card front, securing in the back with SNAIL Adhesive. Wrap another piece of ribbon around the front, tieing a bow.
6. Stamp greeting from Daisy Delight above the ribbon using Soft Suede ink.
7. Attach Soft Suede mat to So Saffron card front. Attach stenciled card front to mat.
8. Attach assorted Candy Dots to front of card to complete.
Supplies Used:
Stamp Set: Daisy Delight
Ink: Soft Suede, Calypso
Coral, So Saffron, Old Olive, Elegant Eggplant ink refills
Paper: So Saffron, Soft Suede, Shimmer White, scrap piece of Whisper
Accessories: Big Shot, Pretty Pines Framelits Dies, Embossing Paste, Palette Knife, 5/8" Burlap Ribbon, Silicone Craft Mat, washi tape, assorted Candy Dots from my stash.
Tips for using Embossing
Paste:
- The Embossing Paste will dry quickly. Be sure to tightly seal the lid onto the jar after you've scooped out the amount needed. I have placed a piece of cling wrap over the opening of the jar before putting the lid back on.
-Clean stencils and palette knives using warm water as soon as you are finished using them. This will save you from having to scrub the paste
off.
-The Silicone Craft Mat is perfect for creating your paste palette. Or, you can use the inside of a plastic lid. Be sure to clean with warm water after use.
-Evenly spread the paste using a palette knife. It's kinda like frosting a cake.
-Set the piece aside for a few minutes to allow the paste to dry completely. A thinner
layer will dry faster than a thicker layer.
-You can add embossing powder to the paste before it dries, then heat emboss using a heat tool. You can also add Dazzling Diamonds or other glitter for a sparkly look!