Instructions:
Paper
Measurements:
Card Base (Petal Pink): 4 1/4" x 11", scored at 5 1/2"
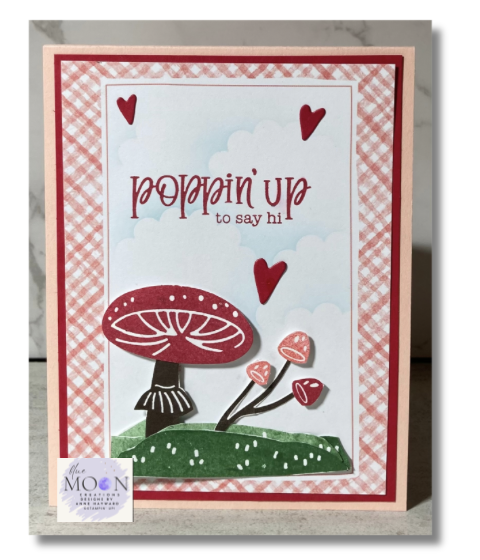
Card Front (Love Notes Mix & Match): 3 3/4" x 5"
Card Front Mat (Real Red): 4" x 5 1/4"
Inside:
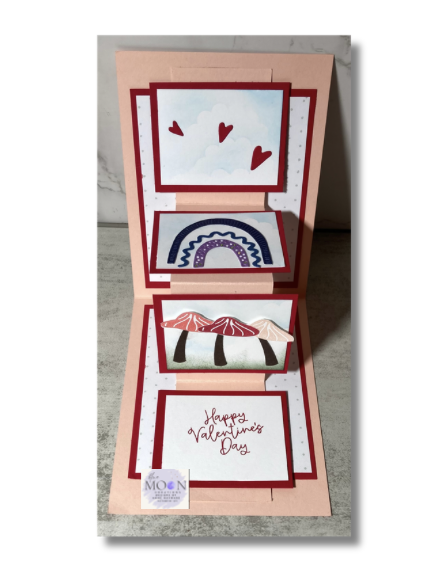
2- Love Notes Mix & Match: 4 1/4" x 3 1/2"
2-Real Red Mats: 4 1/2" x 3 3/4"
"W" Fold Mechanism (Petal Pink): 11" x 2", scored at 2 3/4", 5 1/2", 8 1/4"
4-Inserts (Basic White): 2 1/2" x 2"
4-Mats (Real Red): 2 3/4" x 2 1/4"
Create Card Front and Inside:
- Create cloudy sky on Love
Notes DSP using scallop circle template, Azure Afternoon ink, and Blending Brush for front and 4 inserts.
You can see my How-To Video from 2009 Here
-Stamp, punch, and fussy cut landscape, mushrooms, and stems (Real Red, Flirty Flamingo, Petal Pink, Early Espresso, Garden Green) using Terrific Toadstool stamp set and coordinating Terrific Toadstool Punch.
-Die-cut rainbow out of different colors of card stock using Sunshine Vibes dies. For this card, I used glimmer paper from my
stash.
-Die-cut hearts out of Real Red card stock using Sunshine Vibes die.
-Attach hearts, mushrooms, stems, landscape, and rainbow on card front and insert pieces.
-Stamp greetings (Terrific Toadstools on the front, Bee My Valentine on the
inside) using Real Red ink.
-Attach to Real Red mats.
Complete the Card:
-Attach matted Love Notes Mix & Match to inside
-Fold the mechanism on the score lines (valley, mountain, valley).
-Attach the matted insert pieces to the mechanism, using adhesive only in the center of each piece.
-Measure 1/4" down from the top and bottom of the card base. Attach the mechanism using Tear & Tape
Adhesive.
Supplies Used:
Stamp Set: Terrific Toadstools, Bee My Valentine
Ink: Real Red, Petal Pink, Flirty Flamingo, Early Espresso, Garden Green, Azure Afternoon
Paper: Petal Pink, Real Red, Basic White, Early Espresso, Love Notes Mix & Match, glimmer paper
Accessories: Stampin' Cut & Emboss Machine, Terrific Toadstools Builder Punch, Sunshine Vibes Dies, Mini Dimensionals, Tombow Liquid Glue, Tear & Tape Adhesive, Blending Brush, scallop circle template